
Supplies:
HERE
1. Make a new image 550 x 550 transparent. Note while working on your project leave enough room to add text at the bottom.
2. Open up each of the cards with the Q that I made. You can use the blank one later on if you want to make a different set of cards.
3. Right-click on the Queen of clubs and copy, then go back to your working image, right-click and Paste as a New Layer. Rename the layer "clubs."
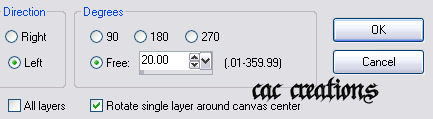
4. Go to image>free rotate make your settings like mine below
5. Open up the queen of diamonds card, right-click and go back to your working image right-click>Paste as a New Layer.
Rename that layer "diamond."
6. Open up the queen of spades card right-click, then go back to your working image right-click and Paste as a New Layer. Rename that layer "spade."
7. On the spade layer go to image/free rotate and this time use the same settings but rotate to the right.
8. Open up the queen of hearts card right-click, then go to your working image right-click and Paste as a New Layer. Rename that layer heart.
Note: if you want to decorate the last card that will show up then follow step 10, 11 and 12. Add the image that you want your center card to have.
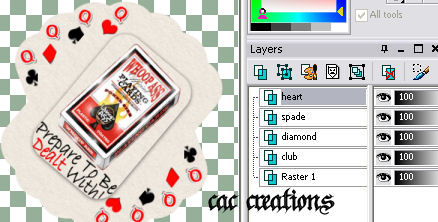
9. On the heart layer go to image/free rotate and this time use the same settings but rotate to the right at 40.00. This is what you should have now.
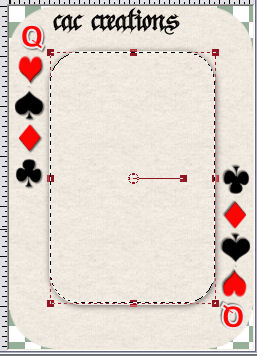
10. On the blank card that has clubs, diamond, spade and heart on it take you selection tool Rounded rectangle, feather 0 and anti-alias checked draw out a box in the center of it like so:
Note: if your having troubles with making the selections perfect then make the selection and go to selections/edit selections you will get a pink box now, then go to raster deform tool shaped the selection
to fit the project, once satisfied go back to selections/edit selections and it will go back to a normal selection.
11. Add a new raster layer.
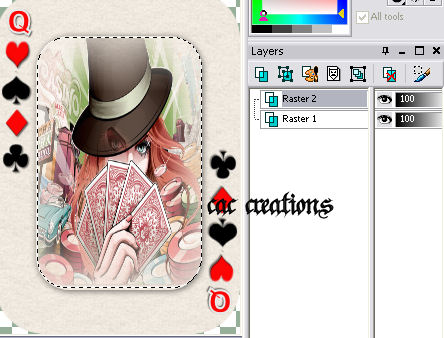
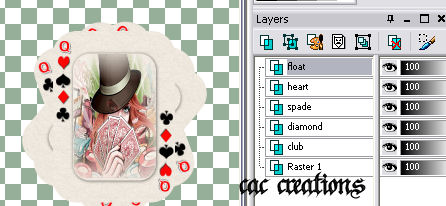
12. Open image 4 right-click and copy go back to the card, make sure you have the raster 2 layer activated, right-click on the working project and paste into the selection you should have this:
13. Go to selections/select none. right-click on raster 2 and merge/visible.
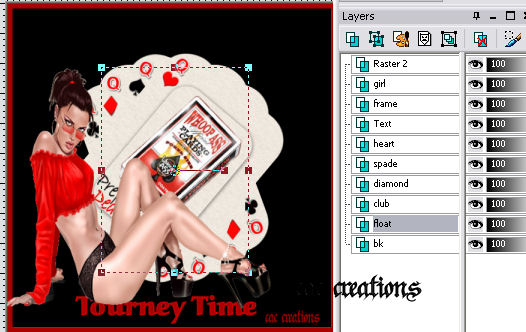
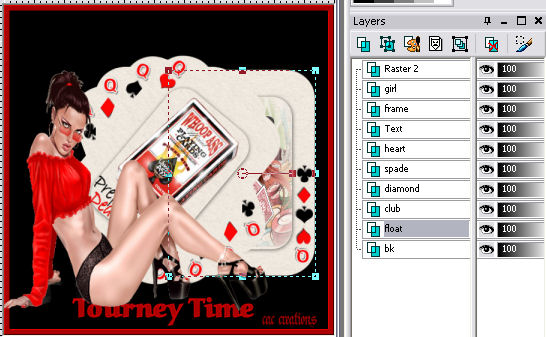
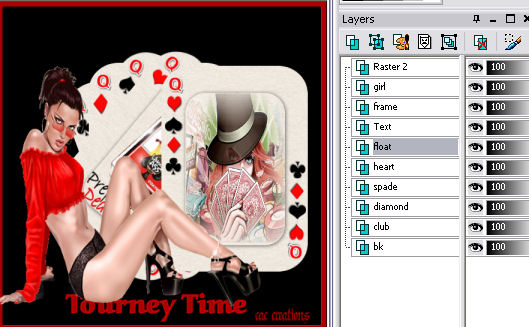
14. right-click on the new card you just made copy it and go back to your original project right-click and Paste as a New Layer. Rename it float.
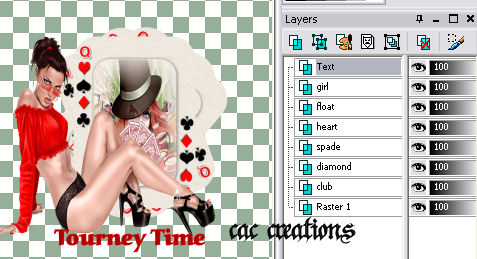
15. Open up image 10 right-click and Paste as a New Layer rename that layer girl.
Use your move tool and position your girl on your canvas.
16. Add some text on a new layer.
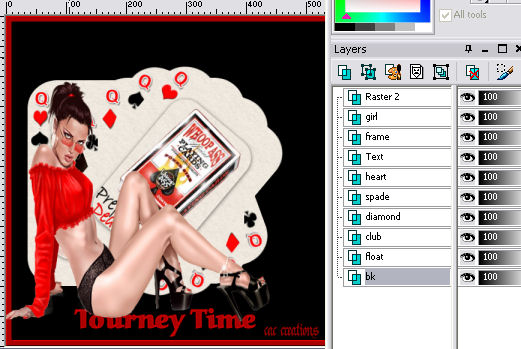
17. Activate raster 1 and flood fill it with black rename it "bk."
18. Activate your text layer and add a new raster layer rename it "frame."
19. Flood fill the frame layer with this color: #ab0001.
20. Go to selections/select all, then selections/modify/contract by 10.
21. Click on the delete on your keyboard.
22. Go to selections/invert.
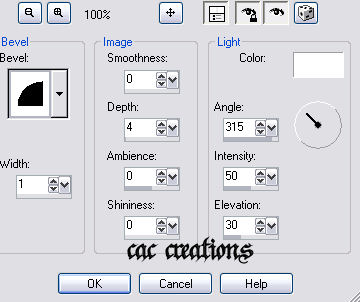
23. Go to effects 3d effects/inner bevel and add this bevel:
24. Selections/select none.
Note: I moved my girl layer above the frame layer, so her hand looks as if it's touching the frame.
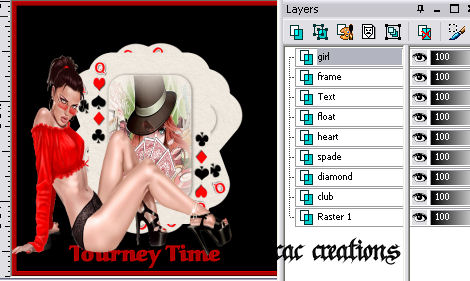
If you aren't doing an animation challenge, just merge it all visible, resize to 450 x 450 and save as a jpeg. All you Bumble Bees can move on to animate the tag.
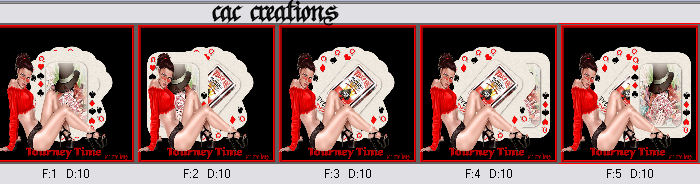
Animation.
25. Open up animation shop.
26. In PSP go to edit/copy merge.
27. Go to Animation shop right-click and paste as a new animation.
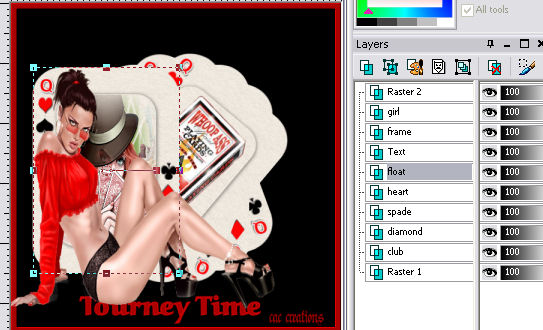
28. In PSP activate your float layer and using your raster deform tool move it to the left, like so:
29. Go to edit/copy merge.
30. Go to animation shop right-click on frame 1 and paste after current frame.
31. Back in psp move your card layer below the float layer
32. Go to edit/copy merge.
33. Go to animation shop right-click on frame 2 and paste after current frame.
34. Back in psp move the card so that is under all the other cards like so:
35. Go to edit/copy merge.
36. Go to animation shop right-click on frame 3 and paste aster current frame.
37. Back in psp move the card so that it is starting to come out from the right side.
38. Go to edit/copy merge
39. Go to animation shop, right-click on frame 4 and past after current frame.
40. Back in psp move the card layer so that is above the heart layer like so:
41. Go to edit/copy merge.
42. In animation shop you should now have 5 frames
43. In animation go to edit/select all.
44. Then go to animation/frame properties and change the display time to 50.
45. From animation resize to 450 x 450 save it and send it in for credit.
ASSIGNMENT:
1. Follow the lesson and turn one in for credit.
Send your results to the Group with a copy to your instructor; be sure to indicate the name of the Challenge.