Written and Copyright © Krys Creations 2009
This is my own creation, any similarities to other
tutorials is purely coincidental and unintentional.
Move the arrow along each step you are on so you don't lose track:
Just left click on the arrow and drag to where you're at:
This was written with PSPX2, but can be used with other versions with slight
modifications.
Supplies are here:
Put the sg_Pansy gradient in the Gradients folder.
The Blue Pastels in the
Textures Folder.
The Bell Bottom font in the folder where you save fonts. (Install font if using Windows 10)
1. Open New 600x300 transparent Canvas.
2. Open (double-click on) Bellbottom font and minimize to Task Bar.
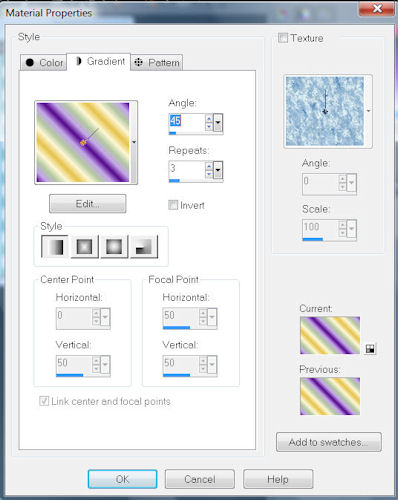
3. Set Foreground/Stroke to: #6e2ca2 and Background/Fill to the sg_Pansy
gradient using these settings:
4. Activate Text Tool, select font Bellbottom and use these settings (it is
important that the letters do not touch each other, so you may need to
increase the Kerning number if any of the letters in your name touch):

5. Type your name in the Text Entry Box and Apply.
6. In the Layers Palette, right-click on Vector 1 layer and select Convert
to Raster Layer from the context menu; rename layer Name.
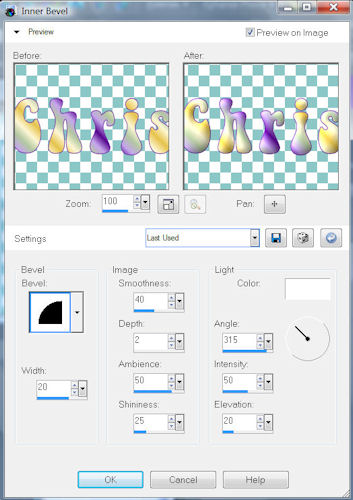
7. Effects>3DEffects>Inner Bevel with these settings:
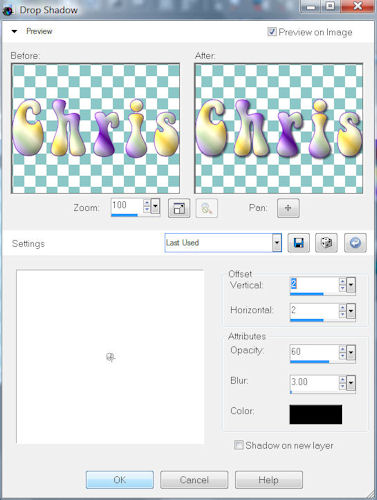
8. Effects>3DEffects>Drop Shadow with these settings:
9. Activate the Move Tool and move your name to the bottom of the Canvas.
10. Activate Crop Tool and on the Tool Options Toolbar>Snap crop
rectangle to>Layer Opaque (do not apply):

11. Put the mouse on the top middle node of the crop bounding box to get
the double up-down arrow:
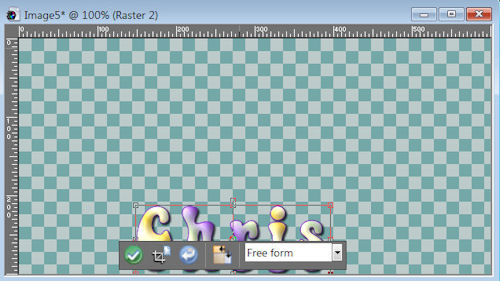
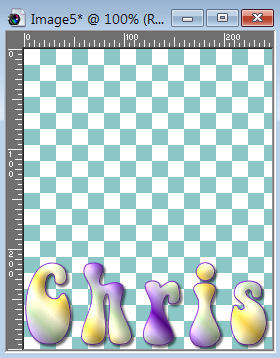
Left-click and drag to the top of the Canvas; then either click Apply (the
check mark icon) on the Tool Options Palette or move the cursor anywhere
inside the crop bounding box and double-click to complete the crop action:
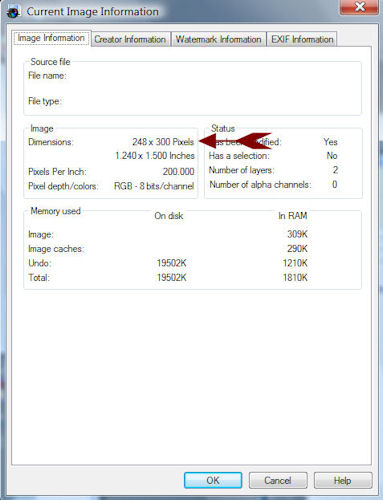
12. Image>Image Information, Image Information Tab; make a note of the
Dimensions of the image (mine is 248x300; yours may be different depending on the size of your name):
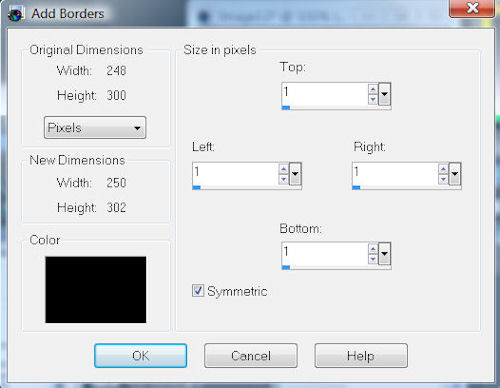
13. Open New image using the dimensions gathered from Image Information
14. Image>Add Borders: Black>1 pixel>Symmetric:
15. Image>Add Borders>Foreground color>2 pixels>Symmetric (right click in
Color box and Recent Colors will come up and you can select the Foreground
color):
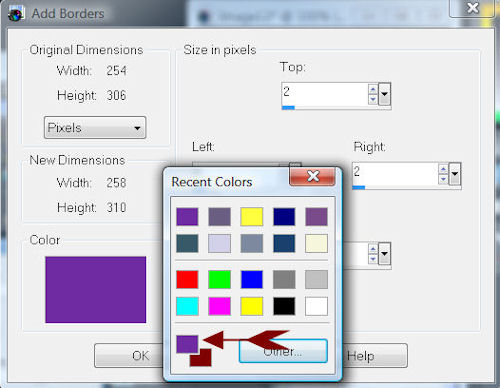
16. Add Border: Black>1 pixel>Symmetric
17. Add Border: White>25 pixels>Symmetric
18. Activate Magic Wand Tool with these settings:

19. Click inside 25 pixel border; Flood Fill with the sg_Pansy gradient,
but first select the Blue Pastels texture with these settings:
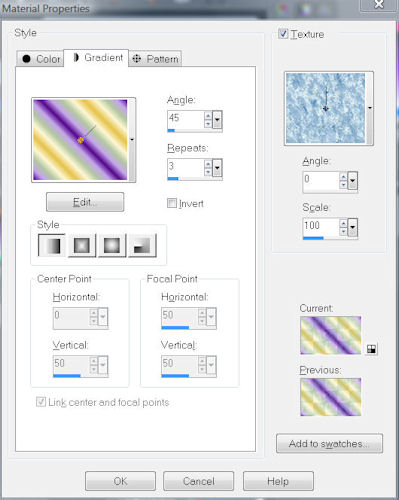
20. Add Inner Bevel with these settings:
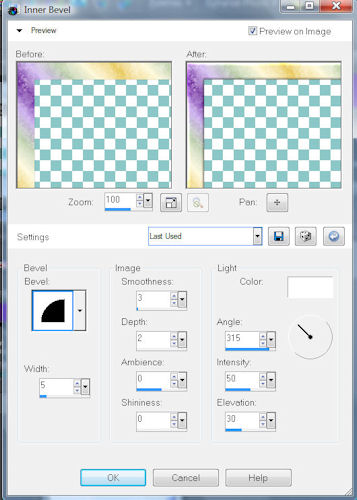
Deselect (Selections>Select None)
21. Add Border: Black>1 pixel>Symmetric
22. Add Border: Foreground color>2 pixels>Symmetric
23. Add Border; Black>1 pixel>Symmetric
24. Add Border: Foreground color>5 pixels>Symmetric
25. Activate Magic Wand Tool; select 5-pixel border; add same Inner Bevel
as Step 20;
Deselect
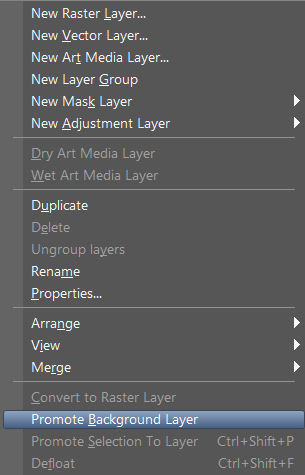
26. In the Layers Palette, right-click and select Promote Background Layer
from context menu; rename layer Frame:
27. With Magic Wand Tool the active tool, left-click inside the white
center of the frame twice (not too quickly); in the Layers Palette
right-click on Floating Selection layer; select Promote Selection to Layer
from the context menu:

Rename Background and move beneath Frame layer (do not Deselect):
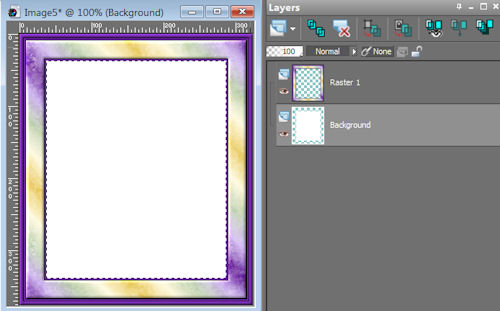
28. Change Foreground>Stroke color to #bacca6 and select same Texture used
before; Flood Fill Background (on top of the white); Deselect
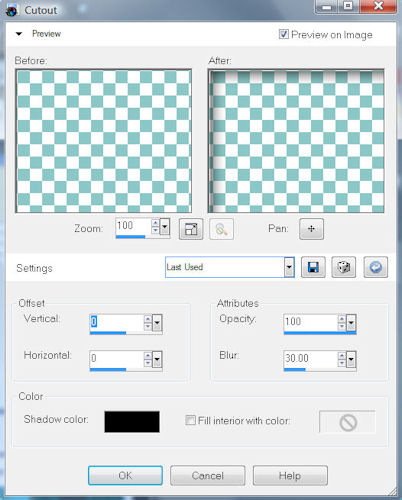
29. Make Frame Layer active; with the Magic Wand Tool active, click in the
middle of the Frame; Effects>3D Effects>Cutout with these settings; Deselect:
30. Activate Canvas with your name; make sure you are on Raster 2 layer;
right-click on Title Bar; select Copy from context menu
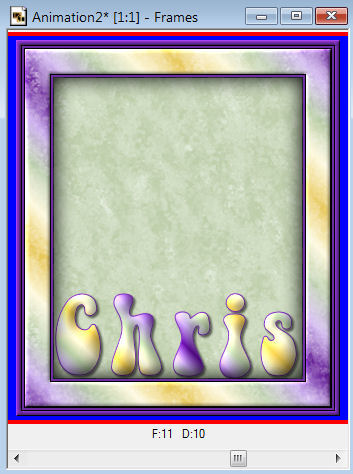
31. Activate Canvas with the Frame; make sure you are on Background layer;
right-click on Title Bar; select Paste>Paste As New Layer from context menu;
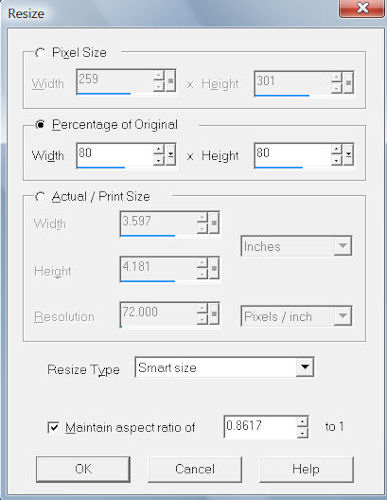
and rename Name
32. If you do not already have Rulers turned on, you should turn them on
now by either View>Rulers; or right-click on Title Bar of Canvas and select
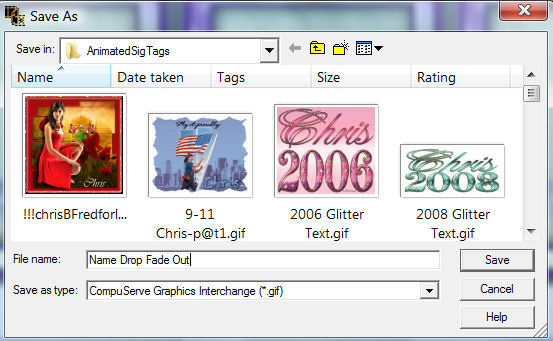
Rulers from context menu; or Ctrl+Alt+R
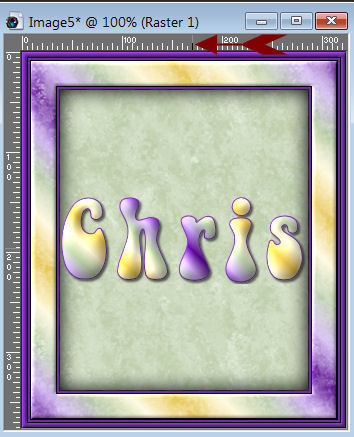
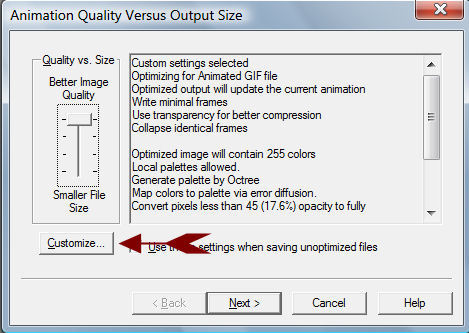
33. Activate the Move Tool; move the cursor over your name; note the
position of the cursor on the horizontal ruler (mine is 170):
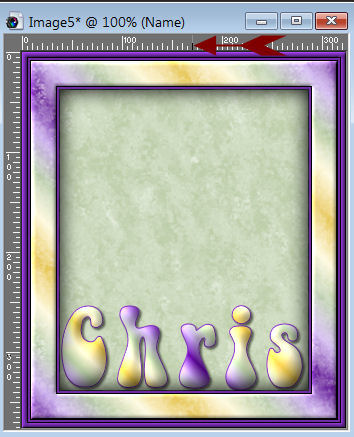
34. Left-click and move your name to the bottom so it just touches the
inside edge of the bottom of the frame, making sure the horizontal point
remains the same:
35. Duplicate Name layer and rename duplicated layer Name2; close off Name
layer (left-click the "eye"):
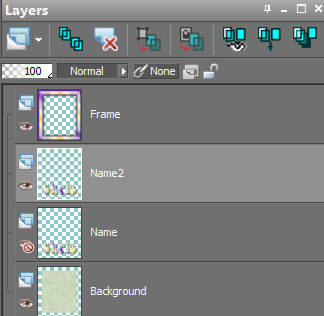
36. With Name2 the active layer, activate the Freehand Selection Tool
(Lasso) with these settings:

Left-click around a letter of choice (it doesn't matter which letter you
choose), right-clicking to complete the selection:
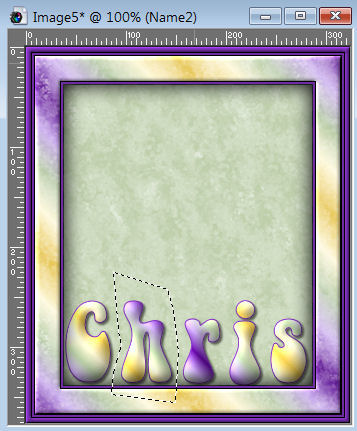
Double-click inside the selection (marching ants) and the selection will
snug up to the letter (and it becomes a Floating Selection in the Layers
Palette):
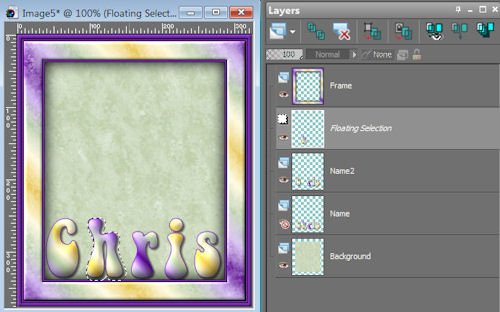
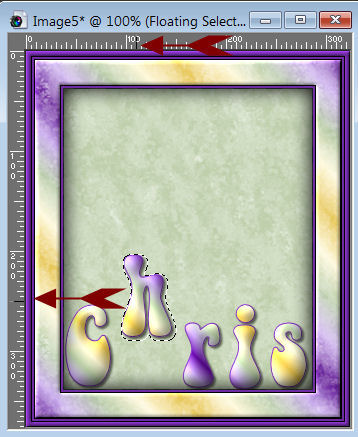
37. Still with the Freehand Selection Tool Active, move the cursor inside
the selection and it should change from the Lasso icon to the Move icon
(4-way arrow). Look at the Rulers and line-up the cursor (I used the 300
mark on the vertical ruler and 110 on the horizontal ruler---your settings
may be different than mine, depending on placement of the letter being
moved):
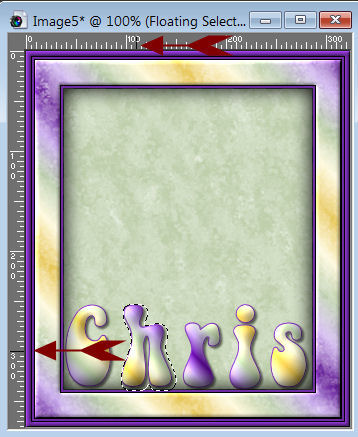
38. Left-click and hold; move the selected letter up 50 on the vertical
ruler (from 300 to 250 on the vertical ruler for me), making sure horizontal
point remains the same (for me 110):
Deselect
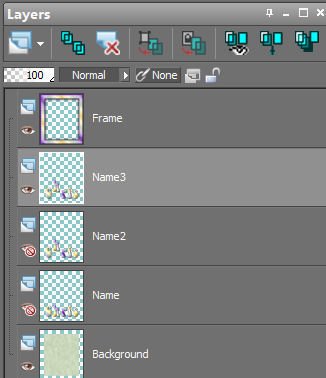
39. In Layers Palette, activate Name2 layer, duplicate and rename
duplicated layer Name3 and close Name2 layer:
40. With Name3 the active layer and the Freehand Selection Tool active,
select the first letter already moved and another letter by left-clicking
around them and right-clicking to complete the selection:
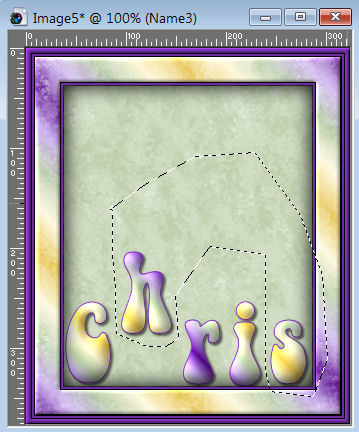
Double click inside the selection area and it will snug up to both letters
and a Floating Selection appears in the Layers Palette:
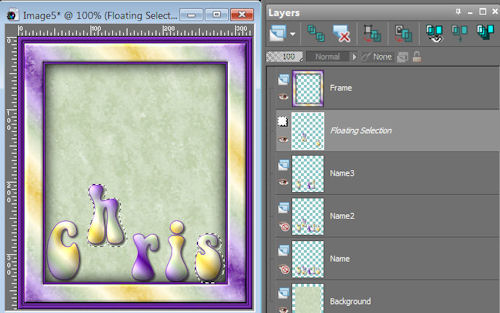
41. Place the cursor inside either selection, note the cursor's placement
on both the horizontal and vertical Rulers:
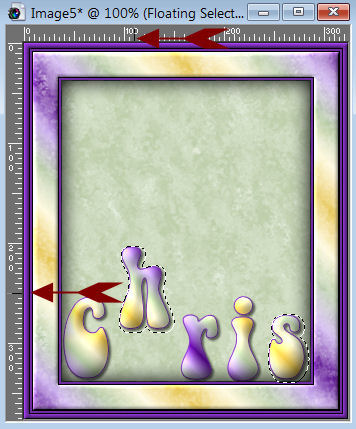
42. Left-click and hold and move up 50 on the vertical ruler, making sure
to stay at the same point on the horizontal ruler (note that both letters move):
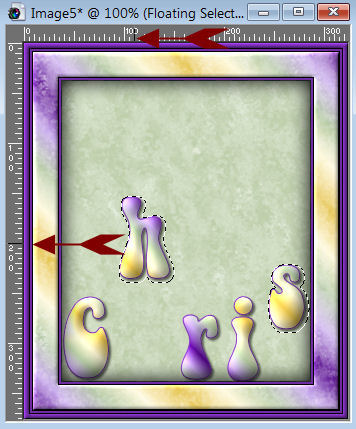
Deselect
43. Repeat steps 39 through 42 (in the Layer Palette, making the top name
layer active and renaming the duplicated layer Name# (where # is the next
number in sequence) until you have only 1 letter sitting in its original
position.
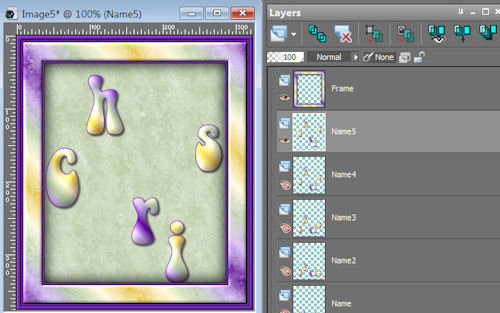
44. At this point I am on Name5 layer and all letters except the "i" has
moved (depending on the number of letters in your name, you may have fewer
or more layers at this point):
45. Activate the Move Tool
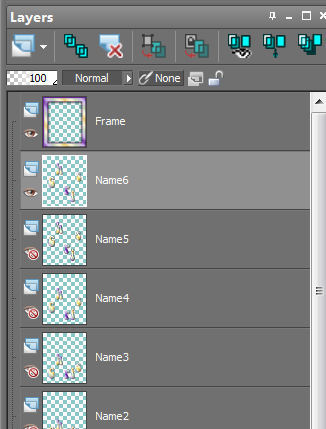
46. Duplicate the top name layer, rename the duplicated layer Name# (where
# is the next number in sequence) close original layer (my new layer is
Name6 and I've closed Name5 layer):
47. With the Move Tool active, place the cursor on any letter; note the
cursor's placement on both the horizontal and vertical Rulers; left-click
and move up 50 on the vertical ruler, making sure to stay at the same point
on the horizontal ruler.
48. Repeat Steps 46 and 47 until the bottom of the last letter is 50 from
the bottom edge of the top of the frame:
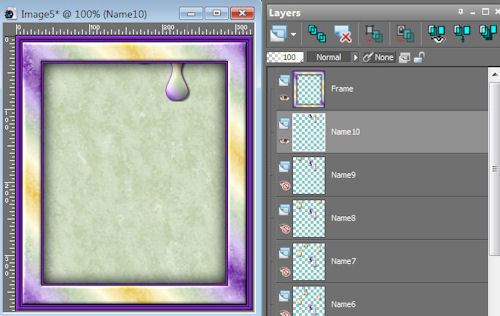
You can see that I am on Name10 layer and that only a portion of the "i" is
visible (this was the last letter to start moving).
49. Close the top name layer and open the Name layer and make it the active
layer
50. Duplicate Name layer; move the duplicated layer below Name layer; close
Namely layer; rename duplicated layer Name01; lower opacity of Name01 to 80:
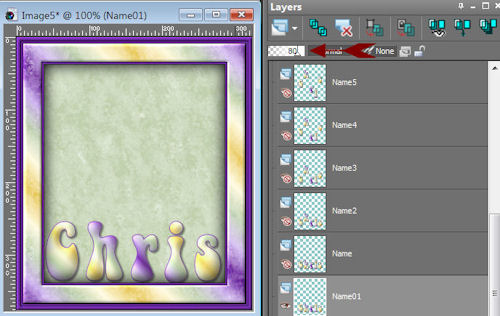
51. Duplicate Name01 layer; close Name 01; move duplicated layer below
Name01; rename Name02; lower opacity of Name02 layer to 60:

52. Repeat Step 51 (renaming the new layers in sequence and reducing each
new layer's opacity by 20) until the opacity has been reduced to 20:
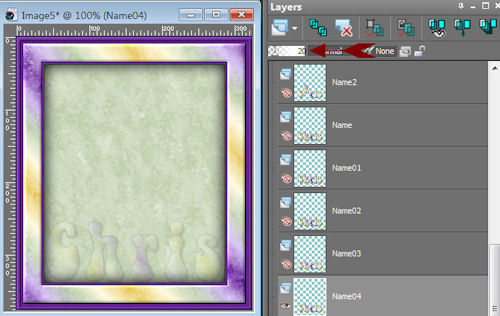
You should be on Name04 layer and just barely able to see your name
53. Close Name04 layer; this will leave the Frame and Background layers
open
54. Right-click on Title Bar of Canvas and select Copy Merged from the
context menu.
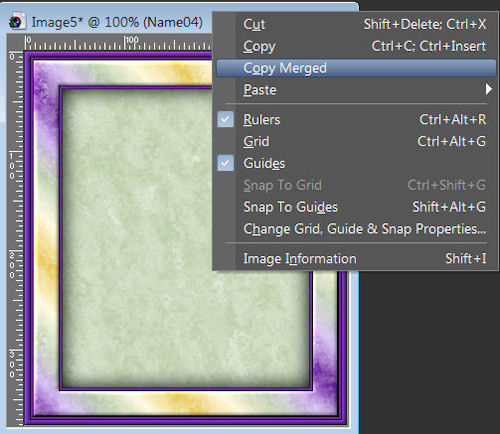
55. Open Animation Shop and either Edit>Paste>As New Animation or, on the
Tool Bar, click on the Paste as New Animation icon:

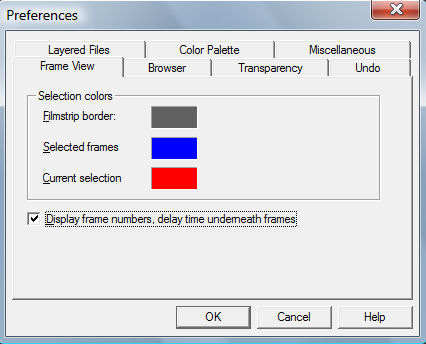
Raster 1 layer has become F:1 (Frame 1); if this is your first venture into
Animation Shop and you do not see the F:1 at the bottom of the Canvas,
File>Preferences>General Program Preferences, select the Frame View tab and
click in the box next to Display frame number, delay time underneath
frames (a check mark should appear):
56. Back to PSP, open the top Name# layer (for me it is Name10):
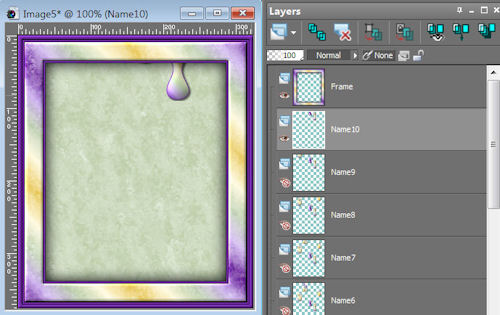
Right-click in Title Bar and select Copy Merged from context menu.
57. Back to AS (Animation Shop) and either Edit>Paste>After Current Frame
or, on the Tool Bar, click on the Paste After Current icon:

F:1 will still be visible, but you should see a scroll bar appear beneath
the Canvas and if you scroll to the right, you will see F:2
58. Back to PSP; close top name layer; open next layer down:
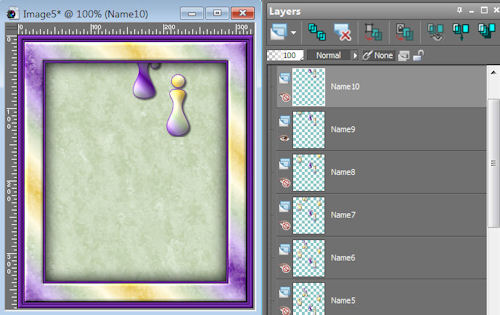
Copy Merged
59. Back to AS; Paste After Current (if you did not move the slider, you
will now see F:3; if you moved the slider to F:2 you will still see F:2;
that is because AS jumps to the current frame with every other frame that is
pasted).
60. Repeat Steps 58 and 59 until you have pasted into AS the Name04 layer
(which should be just above Background).
61. I have ended up with 15 frames (you may have more or less, depending on
the number of letters in your name). You should have one less frame in AS
than you have layers in PSP (I have 16 layers in PSP and 15 frames in AS),
so if you want, you can count layers for a double check.
62. At this point, even though I am not done with the animation, I play the
animation to check and see if anything wonky happens. Either view>Animation
or, on the Tool Bar, click on the View Animation icon:

63. I want to change the display time (speed) of some of the frames (the
default display time in AS is 10/100ths second for each frame).
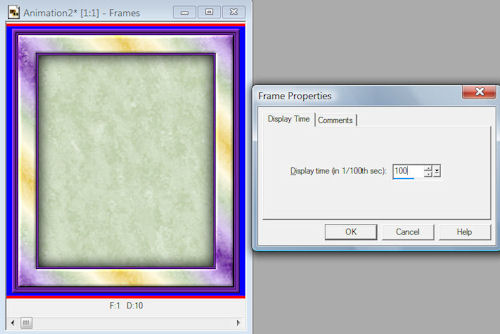
64. Scroll to F:1 and left-click to make it the active frame (if you have
not changed the default colors, the blue you see around the frame means
that
the frame has been selected; the red you see means that the frame is the
active frame)
65. Either Animation>Frame Properties or Alt+Enter and the Frame Properties
box will come up; change the speed to 100:
66. Scroll through the frames and find the frame where all the letters are
sitting at the bottom (for me it is F:11); left-click to make the frame active:
67. Either Animation>Frame Properties or Alt+Enter and the Frame Properties
box will come up; change the speed to 150
68. If you feel the animation need to be resized, now is the time to do
that: either Animation>Resize Animation or Shift+S with bring up the Resize
dialogue box which works much the same as in PSP. I have decided to resize
mine by 80% (after you resize, the animation will expand and you will see
multiple frames side-by-side):
69. Play the animation again and if you are happy with it, you are ready to
save; if you are not happy, make any adjustments you wish now.
70. To save, either File>Save or, on the Tool Bar, click on the Save
icon:

71. The Save As dialogue box will come up; browse to the folder where you
want to save the tag so the folder shows in the Save in box, then type the
name of the tag in File Name and click Save:
72. The Animation Quality Versus Output Size dialogue box will come up,
make sure the slider is all the way up and click on Customize:
73. The Customize Optimization Settings dialogue box will come up and you
will see three tabs: Colors; Optimizations and Partial Transparency, which
should be set as shown:
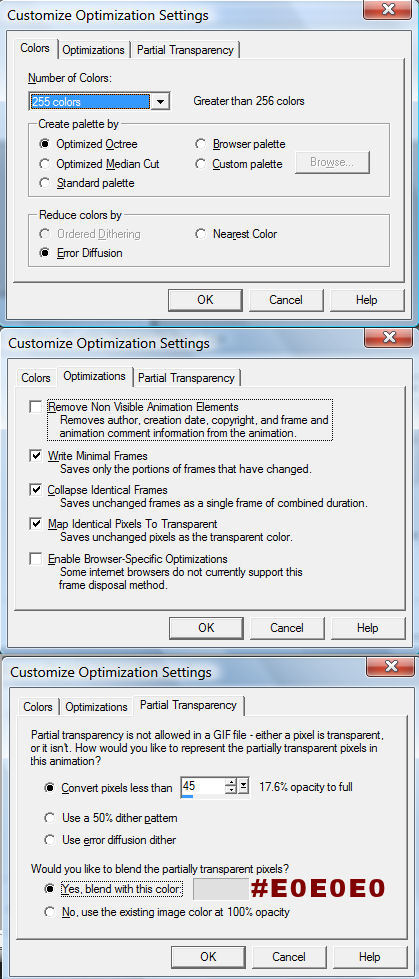
74. Click OK; click Next (the Optimization Progress dialogue box will come
up, just let it do its thing); click Next (the Optimization Preview will
come up); click Next (the Optimization Results will come up); click Finish
75. WOOHOO, all done!!!
ASSIGNMENT:
1. Make a tag following the tut.
2. Make another tag using your choice of font, colors, gradients, patterns,
textures and effects. Here are a couple I made---can you figure out what I
did?
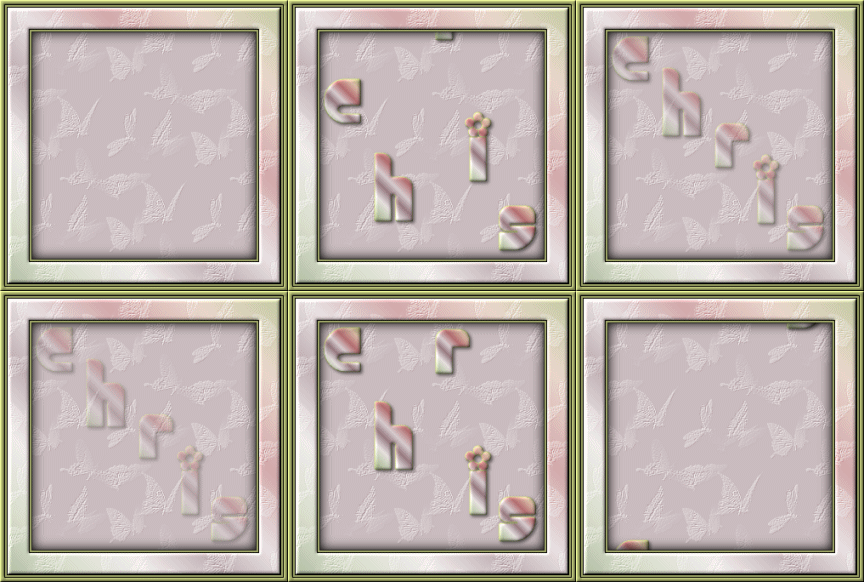
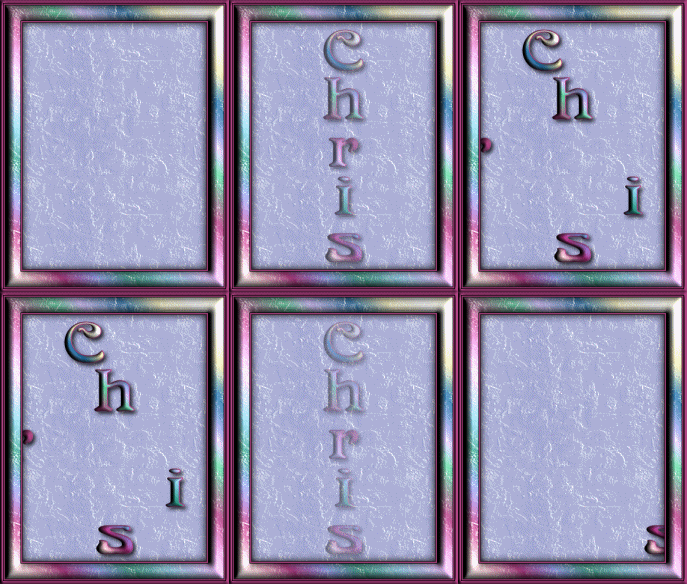
SEND YOUR LESSON TO YOUR INSTRUCTOR AND THE GROUP. PLEASE MAKE SURE YOU INDICATE WHICH
CHALLENGE YOU ARE DOING.
Please do not copy, tear apart, email or share these lessons without my permission: Thank You for your understanding and respect for the hard work that goes into these lessons.

Graphics/Content ©2007 Cherie.
All Rights Reserved.
Page Edited by Jenn Schueller