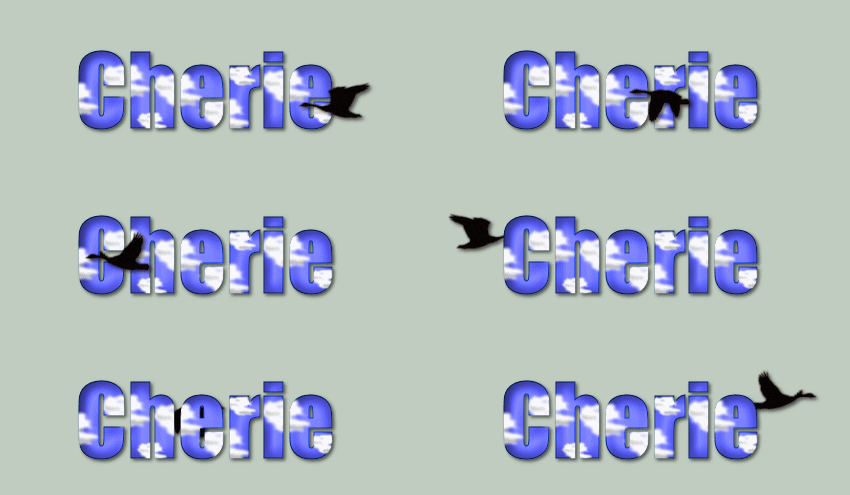
Molly has given us permission to add her wonderful tuts here, her site is no longer available.
Supplies 
This tutorial was written using PSP 8, but can be done with other versions.
I have included a cloud tube for those of you who do not have one, or you may use your own. (You may have a better cloud, this is the first one I've made).
1. Open the cloud tube, choose File, export as picture tube.
2.Open the geese tube, duplicate, close original.
3. Open a new image, 500x400, transparent background.
4. Make your text using font of choice. A fat font would look best with this tag. I am using Bell Bottom Laser, size 72. (I uploaded the font I used in the files section if anyone wants to use it). Create as floating, using background fill color #585CF0 (or color of your choice).
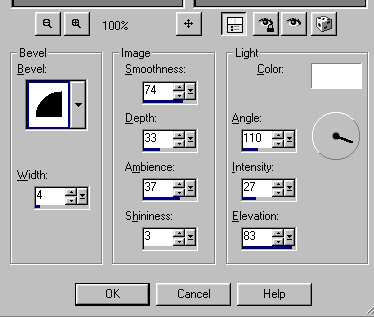
5. Keep selection active, apply an inner bevel:
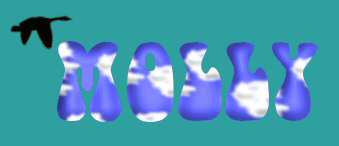
6. With selection still active, apply cloud picture tube at various places on the name, vary size from 10 to 17, and click outside the selected area for some of them. Here is what mine looks like now:

7. Select none.
8. Activate the geese flying tube, resize by 80%, sharpen image. Use lasso tool to select one of the geese, copy and paste as new layer on the name. Position the goose where you want it, so it looks like it is starting to fly.

9.Select another goose, one with wings down, copy and paste as a new layer also. Position the goose in front of the first one, hide first goose layer, copy merged and paste as a new layer on the tag you are building. (Continue to move the geese, one in front of the other, alternating geese, copy merged and paste as a new layer onto the tag image).
10. When you get to the end of your name, choose a goose that looks like it is turning a little.
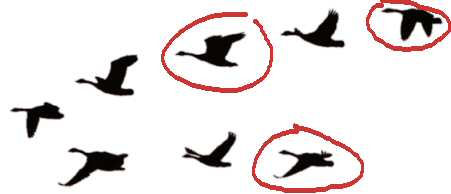
Here is a screenshot to show the 3 different geese I used in my tag:
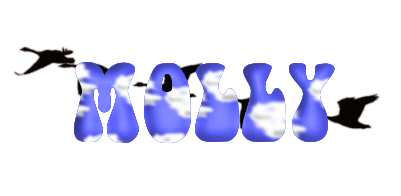
Here is what mine looks like at this point: (4 layers)
11. Now choose a goose at the end of the name, mirror and move into position so it looks like it is turning around and starting to fly back.
12. Copy merged and paste as new layer on the tag you are building.
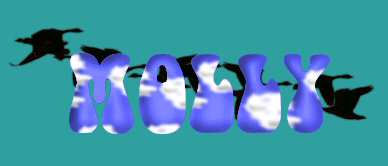
13. Move name layer to top of layers. Unhide a different goose layer, mirror and move into position, copy merged and paste as new layer on the tag image. Continue to alternate the goose and move back across the image. This one will look like it is behind the name. You should have as many layers flying back as you did flying the other way. I have 5 layers each way, for a total of 10 layers for the finished tag. Here is what my finished layers look like for the tag:
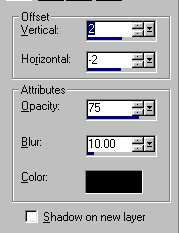
14. Add a small drop shadow to each tag image layer. Here are the settings I used for the drop shadow:
15. Save as psd image, and open in animation shop. I used speed of 25 for my tag. If you chose the drop shadow option, you need to have an opaque background. View animation. If you like what you see, save as gif file, all done!
I hope you enjoyed this tutorial and were able to follow it without any problems. You may share my tuts with others as long as you leave intact, including my links :-)
Molly
ASSIGNMENT:
1. Make one with supplies from the tutorial
2. Make a second animated one using your own supplies.
3. Turn both of them into your instructor and the group.
Send your lesson in like so:
#challenges Bumble Bee Challenge (Flying Bird) for credit.
Send them to:

Please do not copy, tear apart, email or share these lessons without my permission: Thank You for your understanding and respect for the hard work that goes into these lessons.

Graphics/Content ©2007 Cherie.
All Rights Reserved.
Page Edited by Jenn Schueller