|
Glitter Tubes and the font that I used. ()
1. Open a new image 500 x 500 transparent. 2. Click on your text tool.  3. Use these settings for you very first word. Later when you get familiar with the style you can try out different fonts for different effects. Type source Extol O BRK is the font offered with the zip. Please use the font provided for this lesson.
 4. On your Materials pallet close off the foreground and make the background black. #000000. 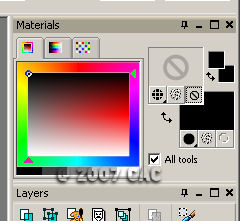 5. Type your word on your canvas. After you type it right click on vector and convert to a raster. Right click again and rename it name. 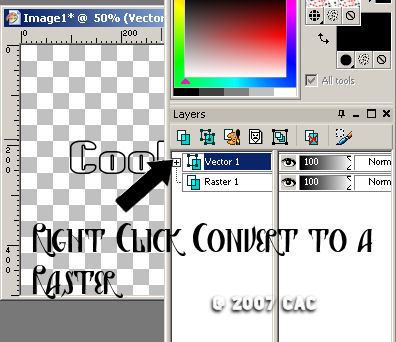 6. Click on your Pen tool to activate it:  Your pen settings should be the same as mine. Your pen settings should be the same as mine.  7. Go to your materials pallet and flip the foreground and background. Like so: 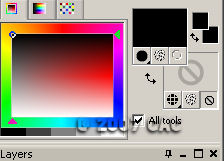 8. Start on the lower corner of your first letter, click on it then more towards the top of the letter like so: 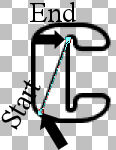 9. After I had the first line drew I drew a second one in my letter C so that it gave an appearance that the line continued like so: 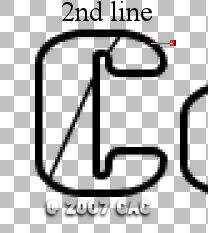 10. Continue through the rest of your letters until you done. Don't forget is there is a break in the letter to stop your line at the break and continue it again were you left off just like I did with the letter C. Once you have finished with all your letters right click on the word vector and convert it to a raster. Rename it once again the word you are using. 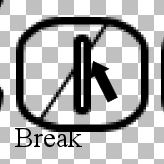 11. Close off Raster 1 and merge the rest visible. 12. Now click on your magic wand  and use the same settings that I have. and use the same settings that I have.  13. Click in one half of each letter. Hold down your shift key as your move through the letters so the ones you want are all highlighted at the same time. See Example: 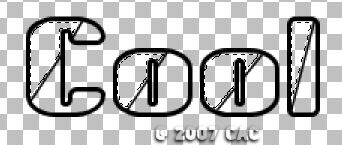 14. Now go to selections/modify/expand by 1. 15. Go to your materials pallet and with your foreground selected go to pattern and find your gold pattern that comes with PSP. 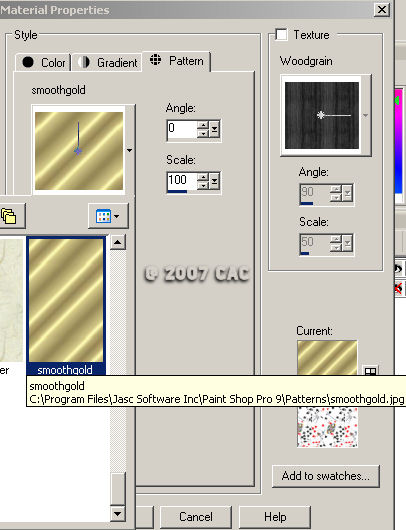 16. Flood Fill your selected area with the gold. Select none. 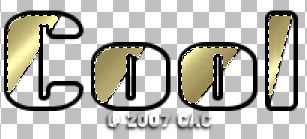 17. While your top portion of your word still has the marching ants go to adjust/add/noise and add noise with these settings. 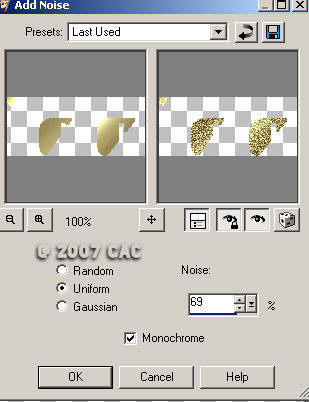 18. Now take your magic wand and highlight the second part of each letter. When you have each letter with marching ants repeat step 14. BABY BEES - REPEAT SAME STEP AS THE GOLD THEN GO SHORT CUT STEP 11 ONLY AND SAVE IT. HONEY BEE'S AND ABOVE FOLLOW THE REST OF THE LESSON.  THIS IS MY BABY BEE, BUMBLE BEE RESULT HONEY BEES AND ABOVE CONTINUE FROM HERE. 19. Open up the silver in psp you will notice that it comes with 3 layers. Click on the first layer, go to edit and copy then click on a blank spot on your psp right click and paste as a new image. Do this separately for each silver layer. You should now have 3 different silver images. Close the original silver you will not need it anymore. Note: Your really may not see it but each one of the silver layers is different. That is why you need to have all three different layers opened individually. 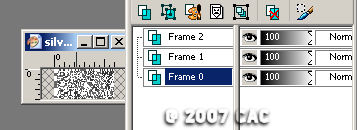 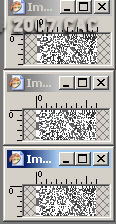 20. With your second half of your letters highlighted click on the name in your layers pallet and duplicate it 2'xs. Doing this will keep duplicated layer highlighted as well. 21. Now double click on your foreground and go to Pattern and find the very first silver glitter pattern. Watch the patterns so you know which silver your working with. For each word layer we will be using a different silver. My first silver is image 21, the second one is Image 22 and the 3rd one is Image 23. Note: when working with glitter you have to duplicate the image your working with to match the number of layers that are within the glitter. The silver only had 3 layers so we had the original name and 2 duplicates to give us 3 layers that match the silver. 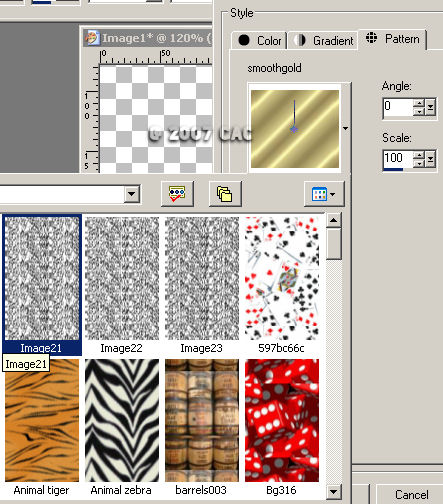 22. Make sure your original word layer is activated and close off the 2 duplicate layers. Flood fill the original word layer with the first glitter image. 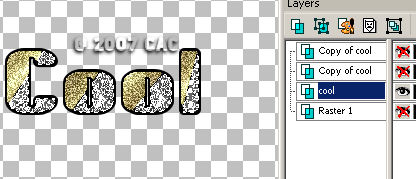 22. Now close of your original word and activate the copy above it like so: 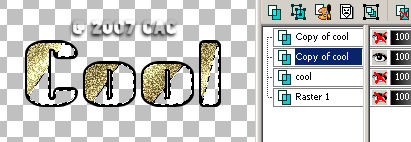 23. Now go back to your material pallet and chose the second silver pattern. Mine is Image 22 see step 21 example. 24. Flood fill this layer with your second silver pattern 25. Now close off that copy and open up the last copy of your word. Close off the one you just filled. It will look like this: 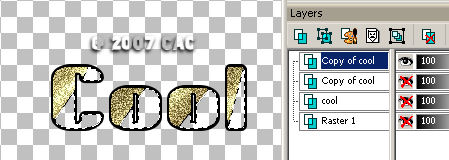 26. Now go back to your material pallet and chose the Third silver pattern. Mine is Image 23 see step 21 example. And flood fill the last copy with that silver. 27. Select none. SHORT CUT TIME 1. Open up your animation. 2. Close off all your layers including psp except for the original word layer. 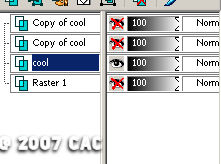 3. Go to edit copy. 4. Go to animation and any blank space right click and paste as a "new animated image". 5. Go back to psp and close off the original name and active the copy of the one above it. 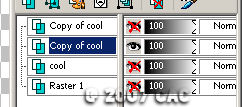 6. Go to edit copy. 7. Go back to animation click on the first image and right click, paste "After Current Frame". 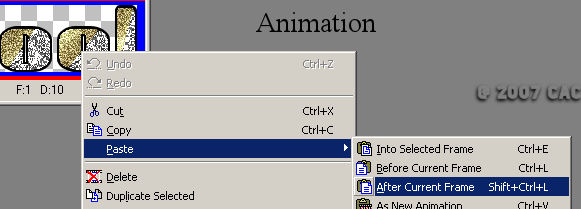 8. Go back to psp and close off the copy of the word above the original and activate the last word layer. 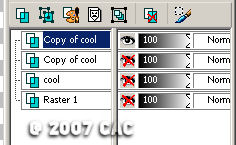 8. Go to edit copy. 9. Go back to animation click on the second frame image and right click, paste "After Current Frame". Note: Take not that F2 is highlighted before I paste the last image in.  10. In animation click on view/animation. I did not alter my frame speeds I liked it the way it was. 11. Save it from animation as a gif resize it from there if you need to as well. NOTE IF YOU OPEN UP YOUR OTHER GLITTERS ATTACHED AND THEY DO NOT OPEN AS AN ANIMATED IMAGE THEN OPEN THEM IN ANIMATION FIRST. FROM ANIMATION GO TO EDIT SELECT ALL AND THEN EDIT COPY. THEN TAKE THEM TO PSP RIGHT CLICK ON A BLANK SPOT AND PASTE ANIMATION AS MULTIPLE IMAGES. THIS WILL OPEN THEM UP IN ALL THE FRAMES THAT YOU WILL NEED LATER. You can do this style with many types of glitter. I showed you how to split the word up but you don't have to the sky is the limit and as I always say with psp you can paint the sky. I added a couple of other examples I added an inner bevel to a few of these. 
 
 |