|
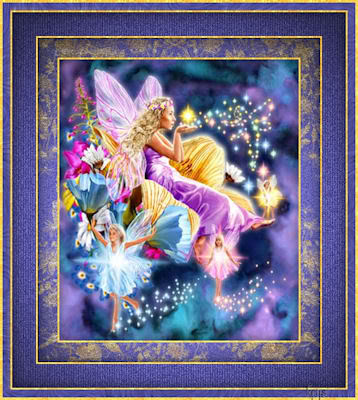
Christmas Scene Frame
Supplies
Super Bladepro (also known as Flaming Pear) 
Eye Candy 4000:
Greg's factory output II:
DSBFlux:
Make your background color white, foreground/background color of your choice from
your own image.
Add a border, 2 symmetric.
Take your magic wand, tolerance and feather at 0 and select the border.
Flood fill with the gold fill pattern,
right-click below:
Keep the border selected,
Go to Selection>Invert.
Layers, new
raster layer.
Effects, cutout vertical and horizontal=0, opacity 65, blur 27.5.
Select none.
Now make your background the color you chose from the image. (I chose #8990BB).
Go to image, add border, symmetric, 25.
Take your magic wand tolerance and feather 0 and click on the border.
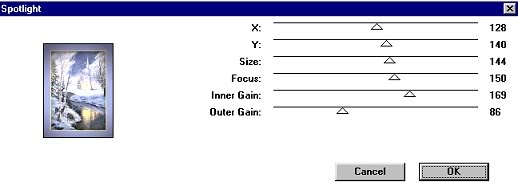
Go to effects, plugins,
Greg's factory output II and select spotlight. Use the following settings.
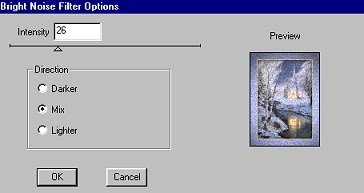
Go to effects, plugins, DSBFlux, bright noise, use the following settings.
 Keep selected.
Go to layers, new
raster layer.
Go to masks, load from disk and load the mask that I included in the supplies.
I do not remember where I got the mask from, if anyone know the owner please let me know and I will give them proper credit. Flood fill the mask with white.
Go to mask, delete and click yes. go to effects, plugins, super blade pro and use
the gold glitter. Again go to effects
Greg's factory output II, spotlight. Use the same settings.
Select none
Make sure your background color is white. Go to image, add border, 2 symmetric. Take your magic wand, tolerance and feather at 0 and select the border. Flood fill with the gold fill I provided. Go to selection, invert. Effect 3d cutout vertical and horizontal=0, opacity 65, blur 20. Select none.
Now change your
bg color to the color you chose before. I used #8990BB. Go to image, add border, 30 symmetric. Take your magic wand, tolerance and feather at 0 and select the border.
Again go to effects
Greg's factory output II, spotlight.
Use the same settings.
Go to effects, plugins, DSBFlux, bright noise, change the setting to 36. Keep selected.
Go to effects, texture effects, blinds. Use the following settings.
 Make sure your background color is white. Go to image, add border, 2 symmetric. Take your magic wand, tolerance and feather at 0 and select the border. Flood fill with the gold fill I provided.
Go to selection, invert. Effect 3d cutout vertical and horizontal=0, opacity 65, blur 20. Select none.
Now change your bg color to the color you chose before. Go to image, add border, 10 symmetric.
Take your magic wand, tolerance and feather at 0 and select the border.
Go to effects, plugins, DSBFlux, bright noise, change the setting to 36. Keep selected.
Go to effects, plugins, eyecandy 4, swirl, click ok.
Make sure your background color is white. Go to image, add border, 3 symmetric. Take your magic wand, tolerance and feather at 0 and select the border.
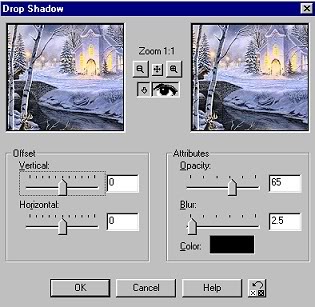
Flood fill with the gold fill I provided. Go to effects drop shadow with the following settings.
 I now resized mine to 80% and started adding the decorations (before animation)
I added the corner1 tube at the top left corner, go to effects, 3d drop shadow, same settings.
selections, promote to layer. layers duplicate, image mirror.
I used the corner2 tube at the bottom, and did the same but this is my preference, you can
use any tube or corners you like. Layers, Merge all visible.
Animation only if you want to animate your image
shift D and make 2 more copies of your picture, add sparkles to what your preference is and
save in order.
Start the animation wizard, by 15.
That's it, I hope you enjoyed this tutorial. The image used was taken from a Christmas Card I have at home.
SEND YOUR RESULTS TO THE GROUP WITH A COPY TO YOUR INSTRUCTOR; BE SURE TO INDICATE THE NAME OF THE OF THE CHALLENGE Please do not copy, tear apart, email or share these lessons without my permission: Thank You for your understanding and respect for the hard work that goes into these lessons.

Graphics/Content ? 2006-2021 Queen Krissy New-Bee's. All Rights Reserved.
This tutorial ? Marsha's Graphics, all rights reserved.
|