|
Cut Glass Frame
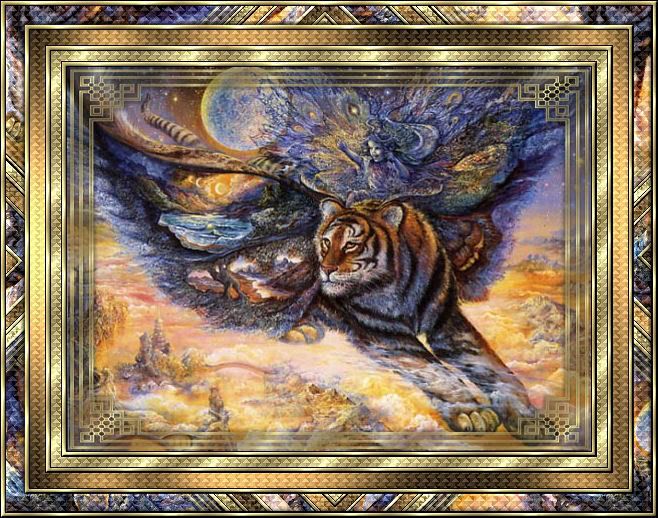
Our example graphic made using this tutorial The original link for this tutorial is down, so the complete tutorial follows.
Golden Cut Glass Frame Tutorial

KR Creations Tutorial
February 2007
Supplies Needed Paint Shop Pro - I used PSP 9 - should work on other versions. Graphic of choice
Supplies (right-click and save)
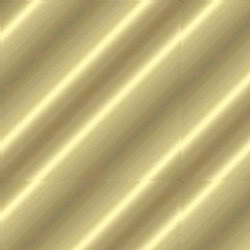
( Gold fill1 , Samarkan Mask)

Filters needed:
Two Moon Filter - Cut Glass
Simple - Zoom Out & Flip, Diamonds
Greg's Factory Output Vol II - Pool Shadow
Find All Filters:
HERE
(Place your mask in your PSP Mask folder; Place your goldfill in your PSP Pattern folder; All Filters go to your PSP Filter folder)
Selecting Color Tip
An easy way to add color to your border. When you want to add a border you go to Image - Add Borders Right click on the Color box 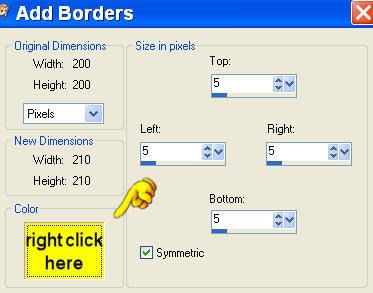

In the bottom left corner are your color selections
So all you have to do is click on the color you need
You can also select any other color shown in this window
Let's get started
All settings will be the same throughout the tutorial unless otherwise stated Open your PSP (Paint Shop Pro)
Open your graphic - duplicate - close original Select one color that will complement your graphic and place in your background on Material Properties
Select Pattern on your foreground and find your goldfill1 pattern; Angle 0, Scale 100
STEP 1
Layers - New Raster Layer Flood Fill with Gold Pattern

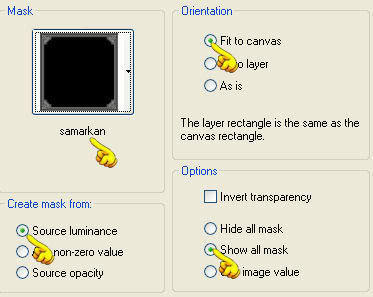
Layers Load/Save Mask - Load Mask From Disk Find Samarkan Mask
Flood Fill with Gold Pattern
Delete the Mask Layer Right click on the group layer and Merge Group
Effects - 3D Effects - Drop Shadow 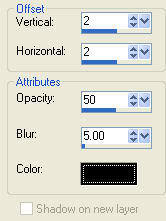
Repeat Drop Shadow but change V&H to (-2)
Adjust Sharpness - Sharpen - repeat again Layers - Merge - Merge All
STEP 2
Image - Add Borders - 1 - color black
Image - Add Borders - 4 - white
Select border with Magic Wand 
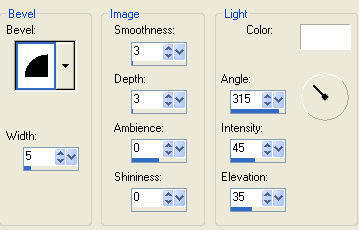
Flood Fill with Gold Pattern Effects - 3D Effects - Inner Bevel
Select None
Image - Add Borders - 1 - color black
STEP 3
Image - Add Borders - 10 - white
Select border with Magic Wand Flood Fill with Gold Pattern Effects - Plugins - Two Moon - Cut Glass
Size - 100; Transparency - 23
Adjust - Sharpness - Sharpen Select None
STEP 4
Repeat Step 2
STEP 5
Image - Add Borders - 15 - chosen color
Select border with Magic Wand
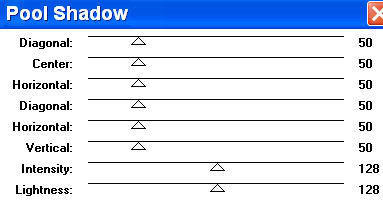
Effects - Plugins - Greg's Factory Output Vol II - Pool Shadow
Effects - Plugins - Two Moon - Cut Glass
Select None
STEP 6
Repeat Step 2
STEP 7
Image - Add Borders - 18 - white
Select border with Magic Wand
Flood Fill with Gold Pattern
Effects - Plugins - Simple - Zoom Out & Flip
Effects - Plugins - Simple - Diamonds
Repeat Diamonds 2 more times
Effects - Plugins - Two Moon - Cut Glass
Effects - 3D Effects - Inner Bevel
Select None
STEP 8
Repeat Step 2
STEP 9
Layers - New Raster Layer
Add your watermark or name to your work
Layers - Merge - Merge All
Resize Frame to 450 H
File - Export - as a jpg compression 20%.
Any similarity to any other Tutorial is purely coincidental and unintentional.
Karen Rodway
Send your results to the Group with a copy to your instructor; be sure to indicate the name of the Challenge.
Send in your lesson like so:
Plugin Challenge (Cut Glass) for credit.


Please do not copy, tear apart, email or share these lessons without my permission: Thank You for your understanding and respect for the hard work that goes into these lessons.
Graphics/Content ?2007 Cherie. All Rights Reserved.
This tutorial ?Marsha's Graphics, all rights reserved.
|