ADDING DROP SHADOW
1. Go to the honey shop or the last link in baby bees says tube shop it is the same thing.
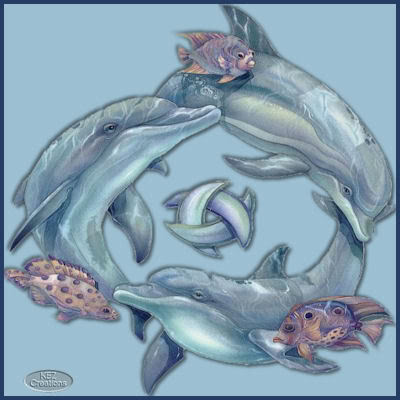
2. Pick out a tube you want to use then right click on it and save target as and save to your desktop.
3. In psp open your tube and then shift + D to duplicate it and then close the original.
4. Open a new transparent image 400 x 400
5. Pick a color out of your tube you like then
flood fill your image. Keep in mind you want it to match nicely.
6. Go up to selections and select all. Keep this selected.
7. Go to layers / New raster layer. Now you will see a blank layer on top of your
flood filled background.
8. Go to your tube and make sure you are on the tube layer and not where the watermark or background is if it has one. Then go to edit copy then back to your blank layer and Edit/ PASTE INTO SELECTION
9. Now go to Selections/ select none.
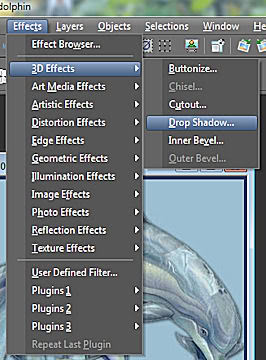
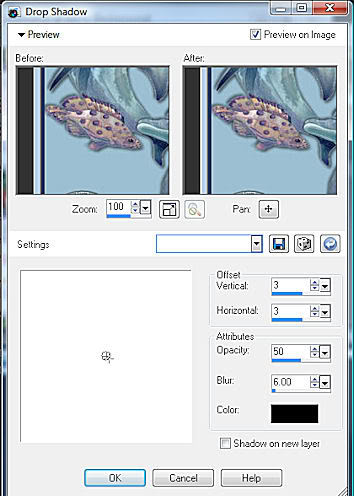
10. Now lets add a drop shadow.
see my images on how to find the drop shadow then look at the settings.


No go back to drop shadow and we are going to do a reverse drop shadow where we change the horizontal and vertical to -3 and leave the other numbers the same.
Now see how it looks like it just jumped out?
Now go to layers/Merge flatten
11. Ok lets add a small border. Go to Image/Add borders
select another color that is in your tube and put it in the box that comes up in borders. Now make the numbers 5 in all 4 boxes make sure
symmetrical is checked.
12. Now add your watermark.
Assignment:
Make 1 along with the lesson and make another one using your own supplies.
Send to your instructor and group for credit.
Please do not copy, tear apart, email or share these lessons without my permission: Thank You for your understanding and respect for the hard work that goes into these lessons.

Graphics/Content ©2006 Queen Krissy New-Bee's. All Rights Reserved.