1. Start by opening a new canvas 500 x 500
2. Flood fill  your canvas with a light color of your choice. I used a0f0a0 because green is a springy color. Rename this layer bk.
3. Open tube creddyflower00030.  Copy and paste as a new layer into your working canvas. Move
  the tube down to the lower right corner. Rename this layer Bear.
4. Go to Effects/3d effects/drop shadow and use my settings.
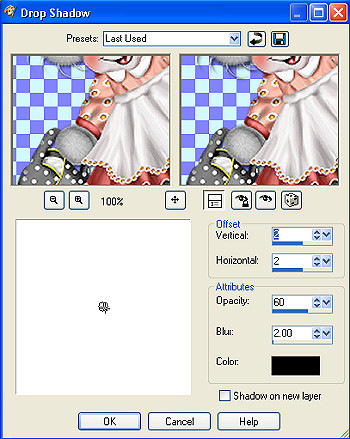
5. Open tube sun. Copy and paste as a new layer into your working canvas. Use the same drop shadow as in step 4. Rename this layer sun.
6. Using your text tool  , add your text. For my foreground color I used c8615b and for my background color I used fbbaa9.
7. I thought my text looked flat so I decided to go to effects/3d effects/inner bevel and add is effect. This is up to you, the creator so feel free to add it or not. My settings were.
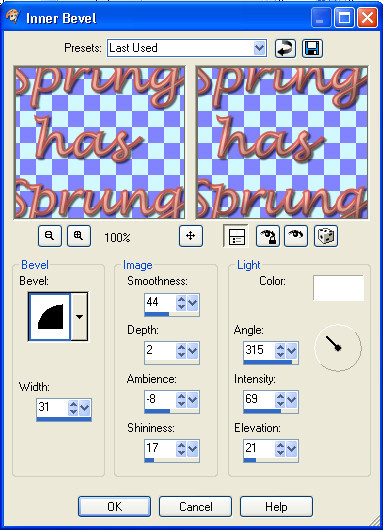
8. Add the same drop shadow as in step 4.
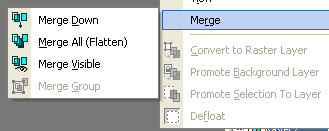
9 Right click on your layers and go to merge/merge all flatten.
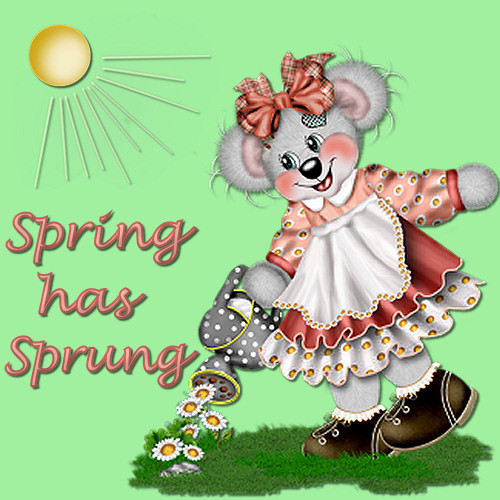
This is what you should have so far
10. Let's add a pretty frame now. Image/add a border using these settings.
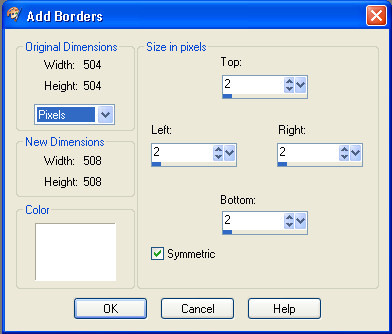
11. Image/add a border use these settings this time.
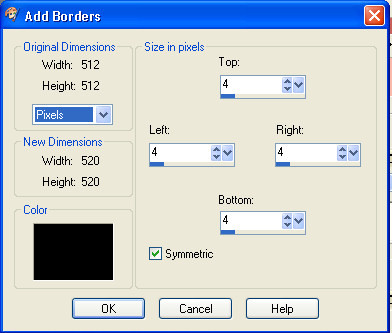
12. Using your magic wand tool  click inside the the black border you just added. You will see marching ants in that area now.
13. Flood fill this border with the same color you used to fill your background in step 2 of this tut.
14. Selections/select none.

15. Image/add a border use the same settings as step 10.
16. Image/add a border use these settings.
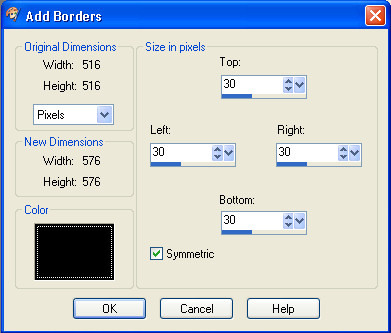
17. Using your magic wand tool again click inside the black border again so you have your marching ants.
18. Flood fill this border again with the same color you used as your background color in step 2 of this tut.
19. Effects/texture effects/weave and use these settings.
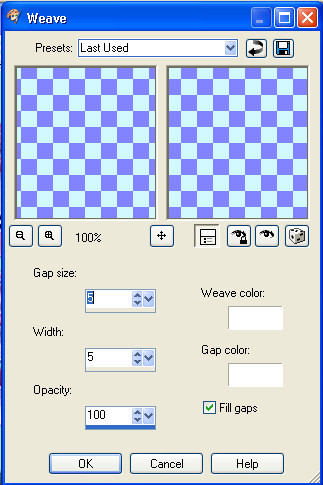
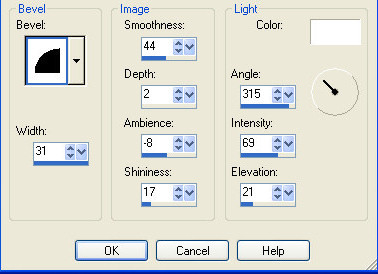
20. Effects/3d effects/inner bevel and add use these settings
21. Selections/select none.
22. Image/add a border use these settings

23. Image/add a border use these settings.

24. Using your magic wand tool again click inside your black border and once again flood fill it with your background color.
25. selections/select none
26. Image/add a border use these settings.

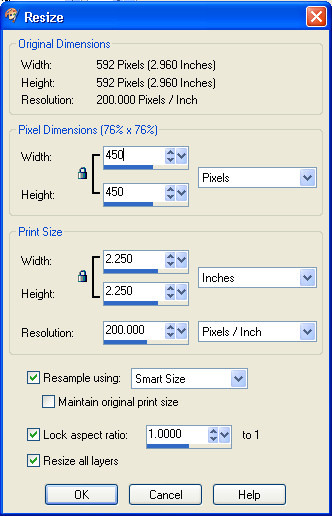
27. Image/resize use these settings.
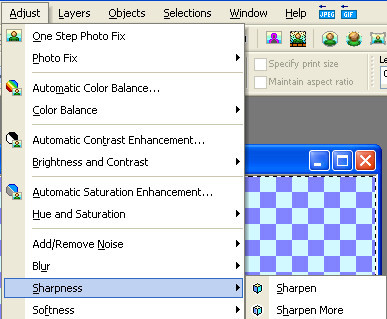
28. Adjust/sharpness/sharpen.
29. Add your watermark.
30. Save your project as a jpg.
Assignment:
Make 1 along with the lesson and make another one using your own supplies.
Send to instructor and group
