|
1. |
Open a new image, 500 x 500,
transparent, 16 million colors. |
| |
|
|
2. |
Set your
Foreground to null and your Background to #c8b494. |
| |
|
|
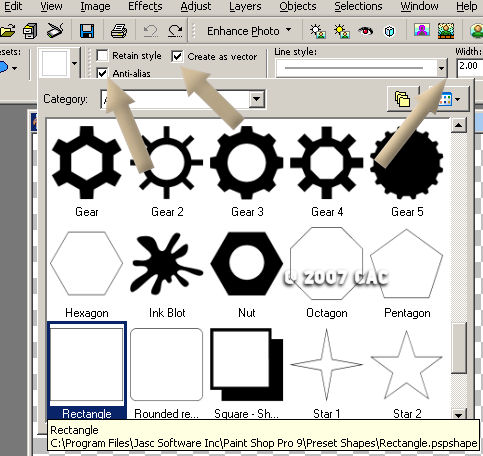
3. |
Choose
your Shapes Tool, Rectangle, Antialias and Create as a Vector
both checked. See Example:
|
|
4. |
Draw a
rectangle on your canvas, It should be the size of your
choice. You can resize it if it is to large at the end of
the lesson. |
| |
|
|
5. |
Go to
Objects, Align, Center in Canvas. Then go to your Layer Palette, right click on your
layer, and click on " Convert to Raster
Layer". Right click again and rename it block. |
| |
|
|
6. |
Now take your magic
Want and click on a blank spot on your canvas. Go to
selections and click on invert. |
| |
|
|
7. |
Now set your Foreground to #a18559 and your Background to null.
Set your Foreground Texture to Wood Grain. Flood fill the
image.
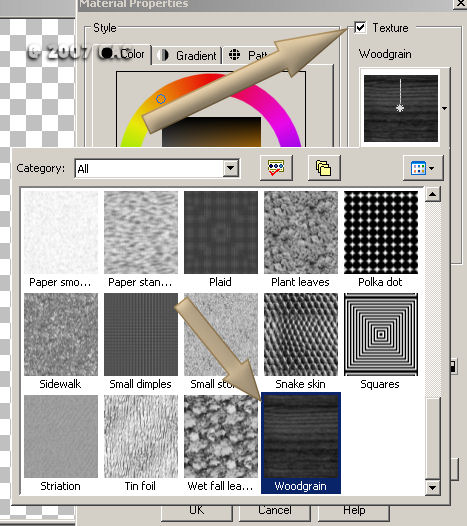
|
| |
|
|
8. |
Now go to
selections and click on invert. |
| |
|
|
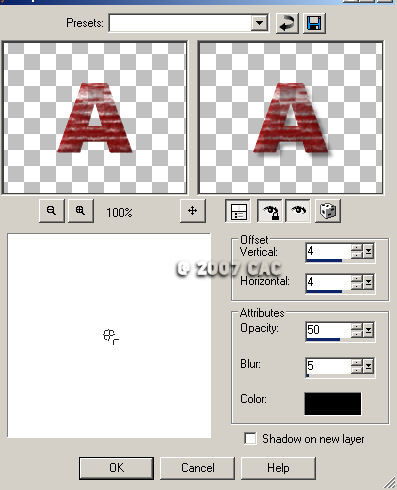
9. |
Go to effects/drop
shadow and follow my example. I used #76654a for my drop
shadow.

Now go back to your drop shadow and repeat it this time make
it -9 on Vertical and Horizontal.
|
|
10. |
Go to selections and click on invert.
This time add noise. See my example:
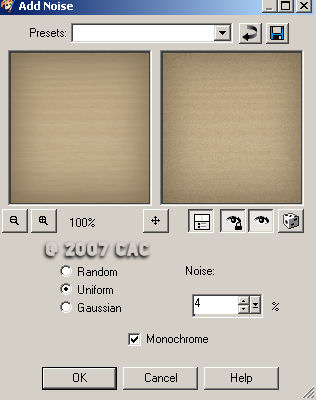
|
| |
|
|
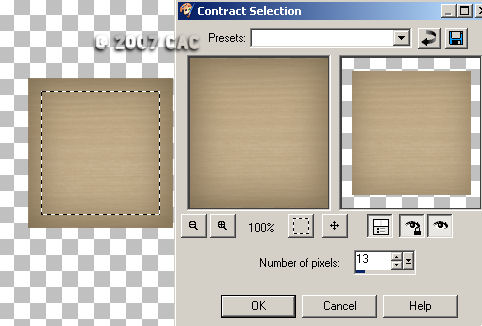
11. |
Now while you
still have marching ants around your block lets add a border to
it. Click on selections/modify/contract and lets contract our
line in by 13.
 |
| |
|
|
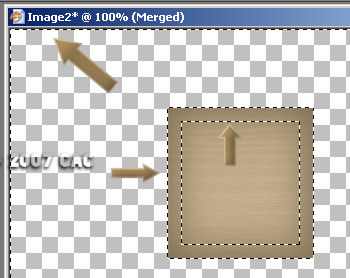
8. |
Click on
your shift key on your key board hold it down and click with
your magic want anywhere in the blank area of your canvas your
should now have what looks like this:
|
| |
|
|
9. |
Go to
selections and then invert and you will have this:
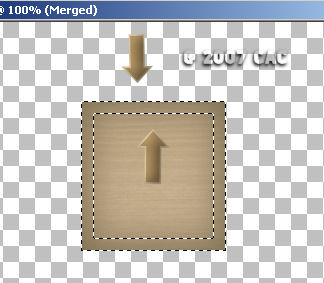
Your ants will now be around the box in the center and the
outer part. This is were you will flood fill your border. |
| |
|
|
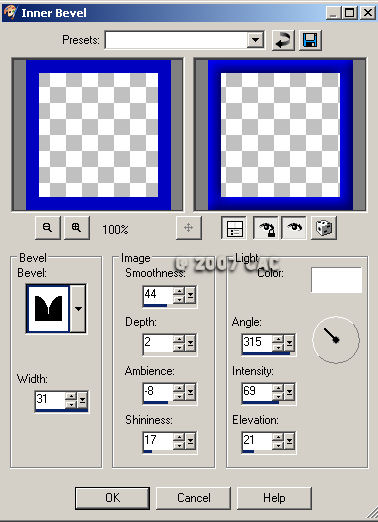
10. |
Make sure your Foreground Texture is still Wood Grain. Flood
fill the border until it's dark enough. I did mine 3 x's.
Once you have your color go to effects/inner bevel
and follow my example.
 |
| |
|
|
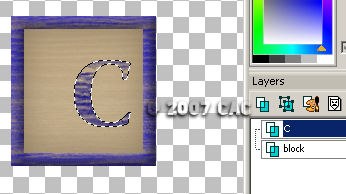
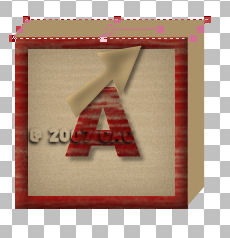
11. |
Now deselect
and add a new raster and rename it the letter that your going to
put in the center of your block.
Set your Foreground to
null and your Background to the same color you used for your
border. This part is important because it
will not work unless you set foreground and background as above.
Set Background Texture to the Wood Grain. Choose your Text
Tool, Selection
checked and apply a letter to your block. Make it a big fat
font. . It doesn't matter at this point if your letter is
centered on your block because once your done you will be able
to move it with your raster deform tool. Notice that with the
text as selected it has the marching ants on the letter this is
how you will flood fill your letter. You may have to do it
a lot to get the desired effect. But remember your making
it look like wood so that's why your flood filling it with the
same color as your border and the wood grain checked.
|
| |
|
|
12. |
Select none
when your finished flood filling. With your letter
activated click on the raster deform tool and move your letter
to the center of the block. Inner bevel as above and drop
shadow (see drop shadow example).
 . . |
| |
|
|
13. |
Merge visible |
| |
|
|
14. |
Add a new layer. Set your Foreground to #ac9268 and your
Background to #ac9268 and . Go to preset shape tool and choose
rectangle once again. Draw a rectangle the same height as
your block and bring it out some. Look at your block and
image it with a side. Use your imagination to determine
how wide the side should be.
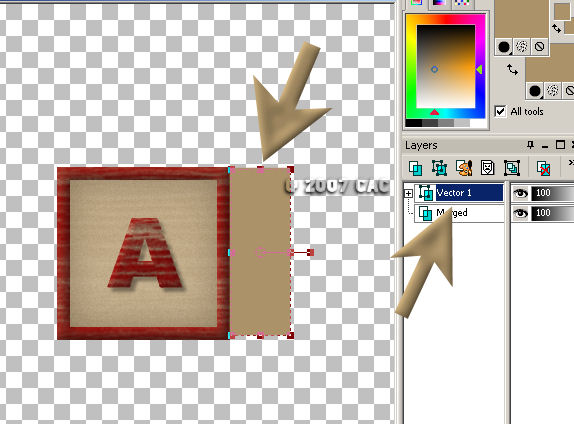
Once you are
satisfied with the size of it right click on vector and convert
it to a raster then right click it again and rename right side. |
| |
|
|
15. |
Click on your
raster deform tool and holding down on your shift key move the
side in towards the back giving it a more square appearance.
See example.
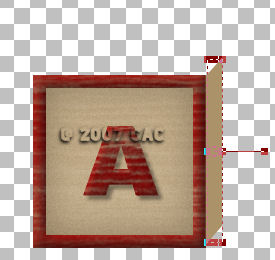 |
| |
|
|
16. |
Now do the same for the top of your block. Using the
rectangle and the same colors make a square and place it on top
of the block. Right click on the layer and convert it to a
raster. Rename it lid. Once again use your raster
deform tool to line it up.
Now the reason that you rename these layers is if they are
not exactly matched against one another all you have to do is
click on the raster deform tool to get them to look more square
instead of starting over. Once your done with that merge
it visible and your done
|