|
Written and Copyright © Cherie This is my own creation, any similarities to other tutorials is purely coincidental and unintentional.
Working with Tubes and making an easy frame without plug-in
Drag the Arrow to mark your progress

Supplies: Flower Tubes used 
Girl Tubes used
1. Open a new image 500 x 500 transparent. I like it large to work with it easier but later we will crop it down a little
2. Open up your 2 tubes provided and choose a color from the tube. Or if you choose you can find a tube that you would like to use. After you find the color you want to use flood fill the color into the new image.
3. Go to effects/Texture Effects/texture
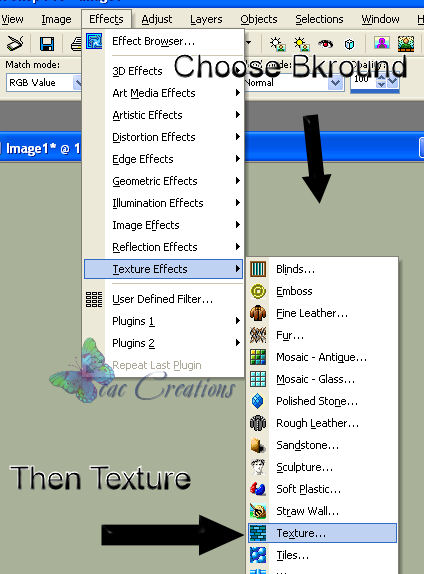
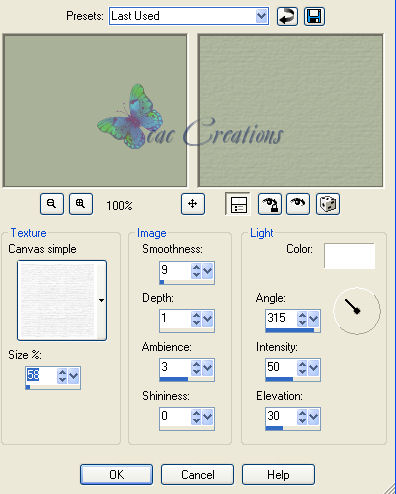
4. Follow these settings and give your background some texture. Don't forget to scroll down on the Texture portion and look for Canvas simple.
Note go to your layers pallet right click on the raster 1 and rename it background.
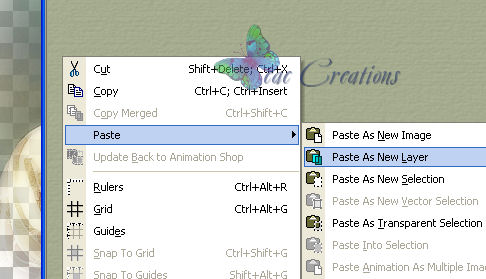
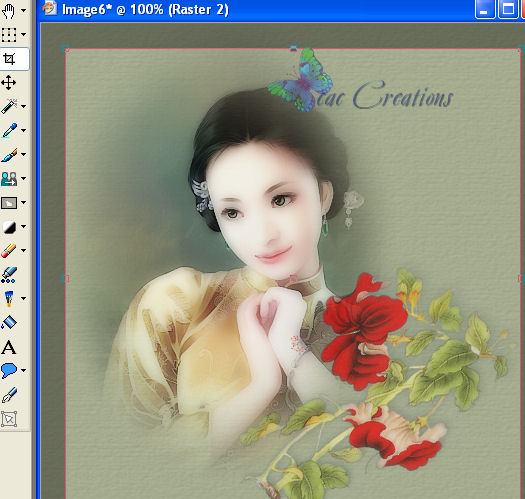
5. Now open up your main tube. Mine is the girl. Right click on it and then click on Copy.
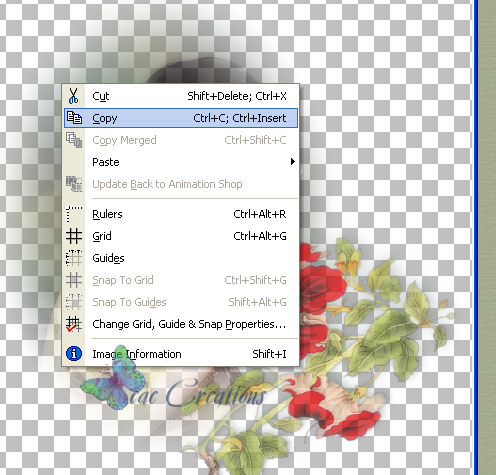
6. Now move to your new background and right click on it and click on paste.
7. Your tube not should be center of your background. Let's crop it down a little so its now so large and fits better within the frame. You do this like so: On your left hand side of your PSP you will see the
crop symbol (look at example) once you have activated it by click on it you move to your image and left click on your mouse and you will see a box starting on the image, drag your mouse until you happy with the size of the box. Then double click on the center of the image and your entire image will
crop down to a different size. Remember that you have your redo button on your PSP if your not happy with the cropped size.
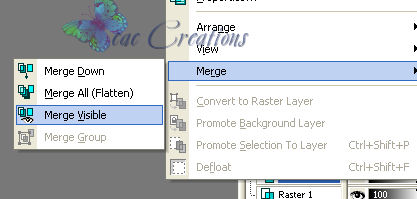
8. Go to your layers pallet on the right side and click on Raster 1 and merge Visible.
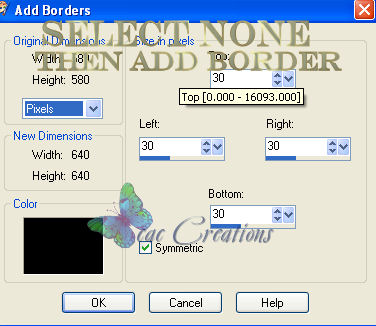
9. Lets start adding a frame. Go Image/Add Borders.
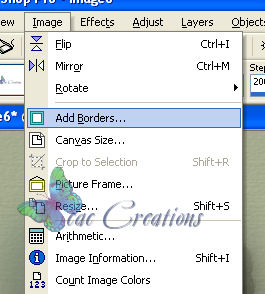
10. And choose a color that is not in your image. (Its easier to select it if it doesn't match) Following my settings below add a border.

11. Using your magic wand click inside of your new border. You will notice that you have 2 sets of marching ants. This is how PSP determines what is to be worked on.
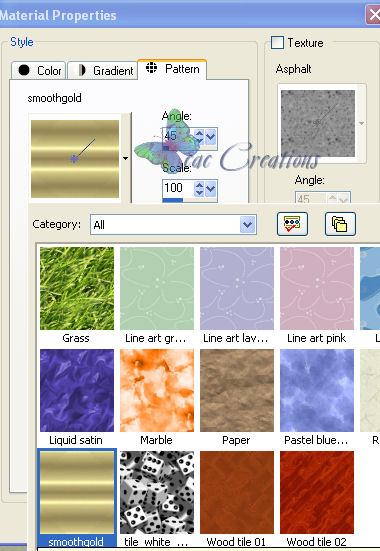
12. Go to your materials pallet on the right hand side and double click on the "Foreground" then choose pattern and look for the gold filled one.
13. Now activate your paint can on the left hand side place it over your border and left click. Your gold will now replace the color you used for the border.
14. Go to selection and invert.
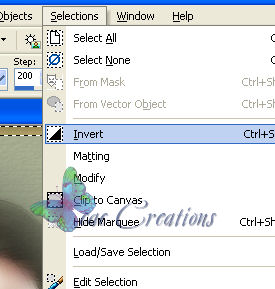
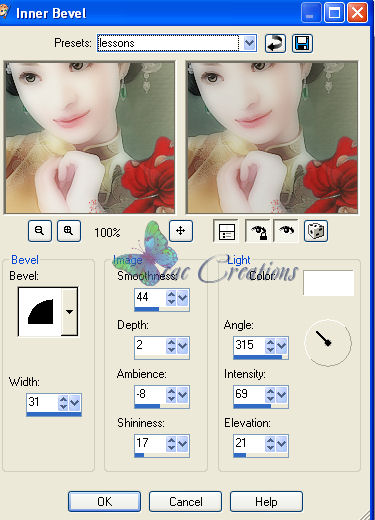
15. Go to effects/3d Effects/inner bevel. Use the following settings.
16. Select None.
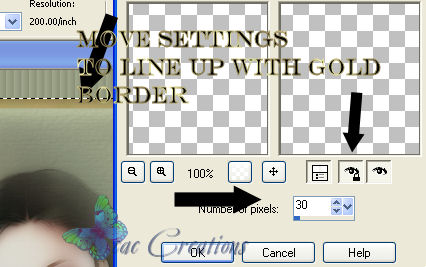
17. Let's add a second border same step at step number 10 but this time lets add it at 30 pixels.
18. Flood fill this border ( see step 13) and flood fill it with the same color that you used for your tube.

19. Let's add a blind to this border. With your marching ants still there go to effects/Texture effects/blinds.
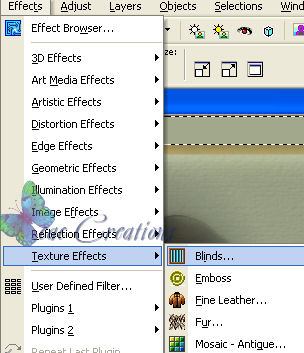
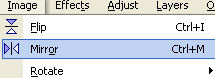
20. Use the same as I did:
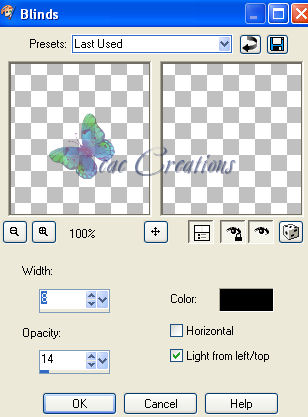
21. Select none. 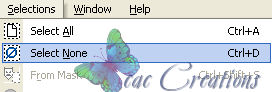
22. Open up the flower tube and follow the same procedure as copying and pasting as in step 5 and 6. Move your flower tube my using the raster deform tool to the upper part of your image. Towards the left hand side of the frame.
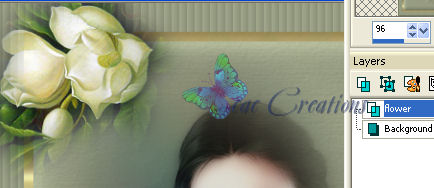
Go to the layers pallet and left click on the flower tube you just added and rename it flower.
23. When you happy with the placement go to Effect/ED effects/Drop Shadow.
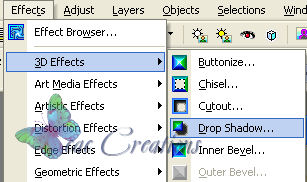
24. Use my settings below.

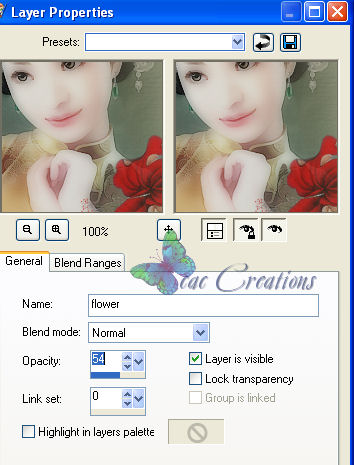
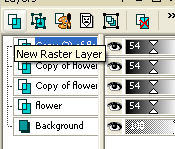
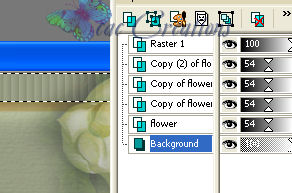
25. Now go to the layers pallet and double click on the flower layer and lower the
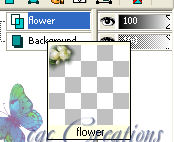
25. Now go to the layers pallet and double click on the flower layer and lower the Opacity to 54. Click okay when your done. You just made the flower a little more transparent.
26. Now while your on your flower layer left click on it and go to duplicate.
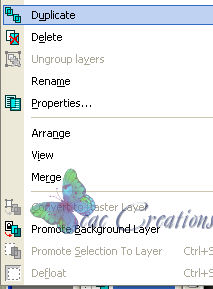
27. You should now have a duplicated flower layer, with that duplicated layer active go to
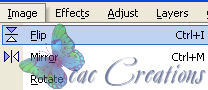
28. Repeat step 26 and this time instead of click on flip click on mirror. Repeat these steps until you have all 4 corners with flowers.
29. When your happy with all the flower placements go to your layers pallet and add a new raster layer like so:
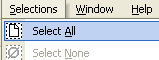
30. Rename it outer frame. Go to selections and select all.
31. You should now have marching ants around the entire project. Go to selections/Contrast and using the size of your image try and get your ants around the very first frame you made like so. Look at my settings on the contrast if you set them like mine you will see the work
change on the main image.
32. Once it looks like the marching ants are going around the outside of the gold frame go to selections and click on invert. Same as step 14.
33. You should now have a double row of marching ants.
34. Once you have accomplished your double ants click on background on your layers pallet to activate it.
35. Go to effects/3d effects/inner bevel and use my settings below to add a bevel.

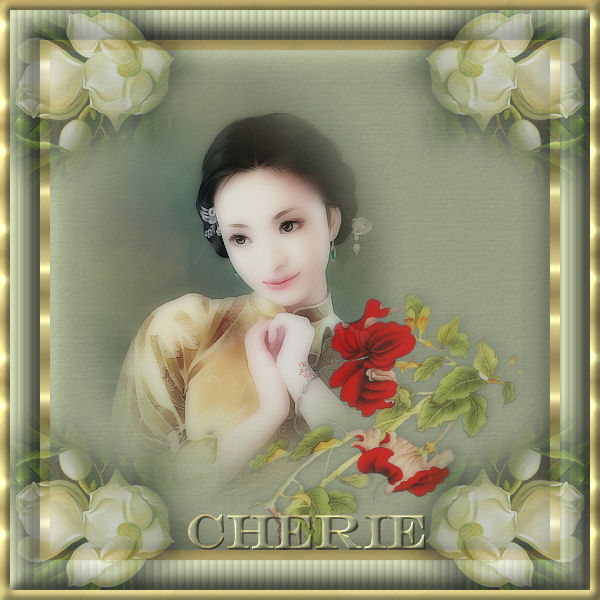
When your all done go to text and add your name or whatever text that you want to use. Resize it to 450 and then go and sharpen it. Next Go to File/export/jpeg and save it.
ASSIGNMENT:
1. Turn in one based on the assignment above
2. Make another one using your own supplies.
Happy Creating all
SEND TO YOUR INSTRUCTOR AND THE GROUP SEND YOUR RESULTS TO THE GROUP WITH A COPY TO YOUR INSTRUCTOR; BE SURE TO INDICATE THE NAME OF THE OF THE CHALLENGE Please do not copy, tear apart, email or share these lessons without my permission: Thank You for your understanding and respect for the hard work that goes into these lessons.

Graphics/Content © 2006-2021 Queen Krissy New-Bee's. All Rights Reserved. |