Written and Copyright ©Connie's Designs
This is my own creation, any similarities to other tutorials is purely coincidental and unintentional.
Permission to use the tutorial given to Queen Krissy's New Bees
We are going to decorate 2 pages of our book. In the supplies a book I have created for you to use.
Drag the Arrow to mark your progress

Download the supplies here:
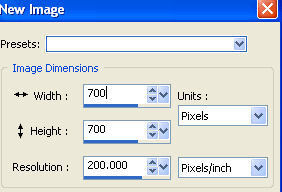
1. File New and make your image 700 x 700
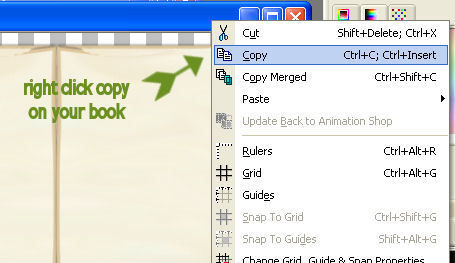
Open the book in your supplies. Right click and copy paste as a new layer

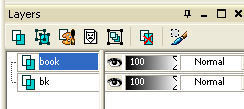
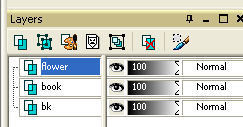
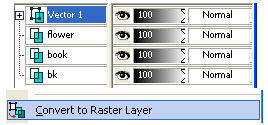
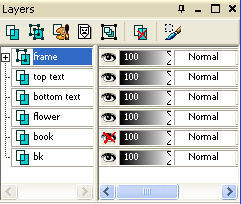
3. You can close out your book now; you no longer need it. You should have 2 layers. Rename your book layer (book). Rename your raster layer 1 bg (background).
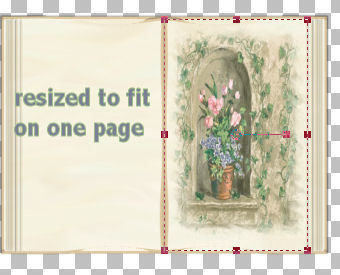
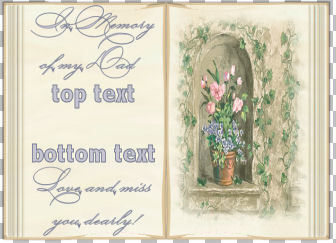
4. Let's decorate one of the pages with a nice flower tube. Open your flower; right click; copy; paste as a new layer. Rename this layer (flower).
5. Minimize your flower as we will need it later for the bg. With your flower layer active, click on your deform tool and resize your flower to fit on your page.
See Example:
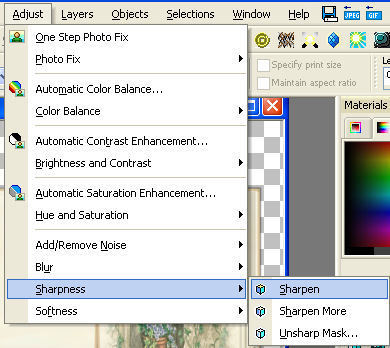
6. Since we adjusted the flower, lets got to adjust sharpen.
7. Let's decorate the other page with some text. Open your font from your desktop (new version install your font) so it will be active in your psp. Click on text and look for your font.
These are my
settings:

8. Pick out your font colors. I used #7b8095 for the foreground and #c7c5d0 for the background.
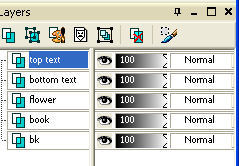
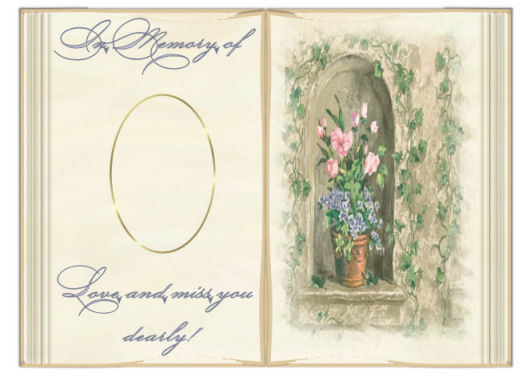
9. Since your text will be a vector layer, right click on your vector layer in your layer pallet and convert to raster layer. I wrote something at the top and something at the bottom (that's 2 layers and renamed them both top text and bottom text) and then centered them. I also used my raster deform tool and moved my text where I wanted it.
10. Now that you have your text; lets make a frame. click on your preset shape tools and pick the ellipse. Make your settings like mine:

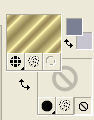
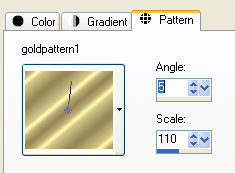
11. Close off your background layer and make your foreground layer the gold patter like mine:
12. Draw out your frame. Notice it is a vector layer, so right click on the vector and convert to raster layer. Rename this layer (frame). Move it with your raster deform tool so you have it centered like you want it. This is what mine looks like:
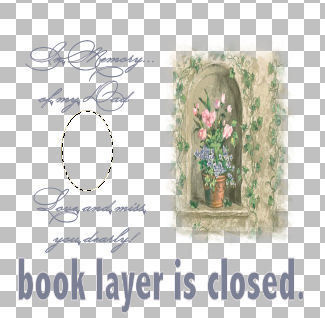
13. Close off your book layer by clicking on the "eye" in your layers pallet.
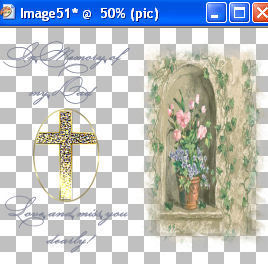
14. With your frame layer active get your magic wand and click inside your frame to get the marching ants.
15. Selections>modify>expand by 1.

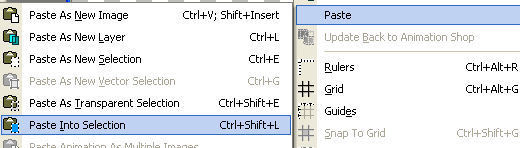
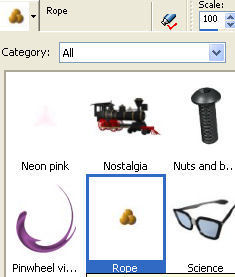
16. Open up your picture you want to use; copy and paste into selection. (I used a cross and just pasted as a new layer and renamed the layer. Also did one by pasting into selection.)
17. Selections none. You can open up your book layer now.
18. Activate your bg layer. Pick the gold pattern and make your settings like mine.. Flood fill your bg layer with the gold pattern.
19. Make a new raster layer and name it bg2. Flood fill bg2 with #7c7256.
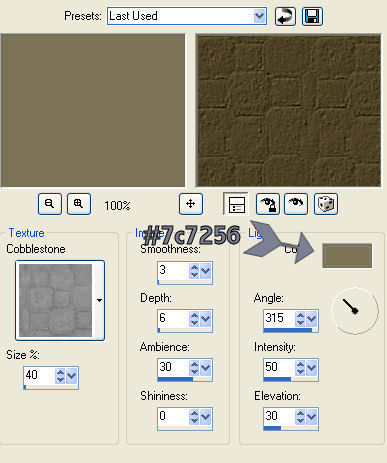
20. While bg2 is active, click on effects/texture effects/texture: Pick cobblestone and make your setting like mine then click ok.
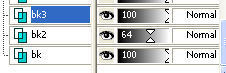
21. On bg2, lower the opacity to 64.
<
p align="center">22. Make another raster layer and name it bg3. Since you minimized your flower layer, click on your foreground and look under patterns for your flower.
Make your settings like mine:
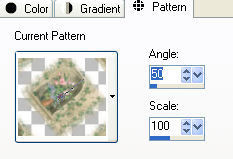
23. Flood fill your bg3 with your flower pattern. Notice the order of my bg layers. After yours are like mine, close off all your layers except bg, bg2 and bg3. Merge visible. Rename bg then open up your closed layers.


24. Click on your picture tube tool: locate your rope. We are going to make a bookmark.

25. Add new raster layer and name it bookmark. Draw a straight line using the rope tube down the center of your book. I even added a few stray tassels at the end. (use your undo button if needed.)
26.
Right click and merge all layers flatten. (make sure you have all layers open.)

27. Crop your image; be sure to include some of your bg.
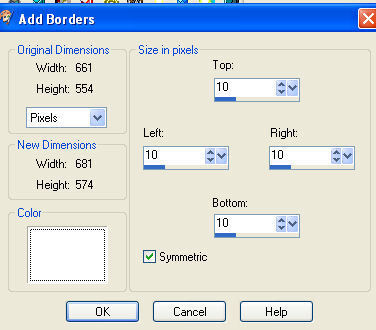
28. Image/add border using white and making sure symmetric is checked.
29. Use your magic wand and click inside your white border. You will see double marching ants. Flood fill with your gold pattern as before.
30. Selections none.
31. Image new raster layer.
32. Add your watermark.
Save as a jpg.
<
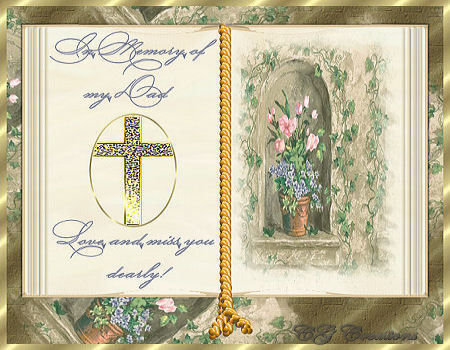
p align="center">This is another tag I created using this tut.

ASSIGNMENT:
1. Make one with supplies from the tutorial
2. Make a two more using your own supplies.
3. Turn them into your instructor and the group.
Send your lesson in like so:
#honeybeechallenge Honey Bee Challenge (Book)
Send them to:

Please do not copy, tear apart, email or share these lessons without my permission: Thank You for your understanding and respect for the hard work that goes into these lessons.

Graphics/Content © 2007 Cherie.
All Rights Reserved.
Page Edited by Jenn Schueller