|
Written and Copyright © Cherie
This is my own creation, any similarities to other
tutorials is purely coincidental and unintentional.
DOWNLOAD THE SUPPLIES HERE 
Open up all the contents from the zip file in your psp and minimize them until you need them.
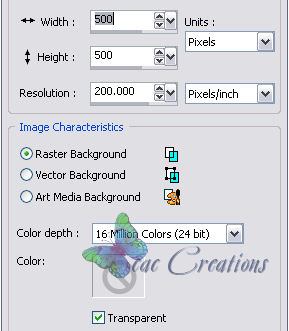
1. Go to file/new and follow my example: 500 x 500
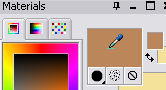
2. Click on your preset tool button  then go to your materials pallet and click on the foreground to bring up the materials properties box. then go to your materials pallet and click on the foreground to bring up the materials properties box.
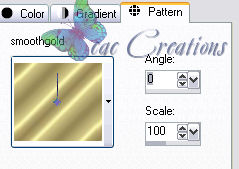
3. Find the gold pattern you have on your PSP from the zip file that was supplied in the lesson. Select the gold and use my settings.
4. Close your background so it is off. 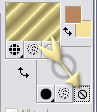
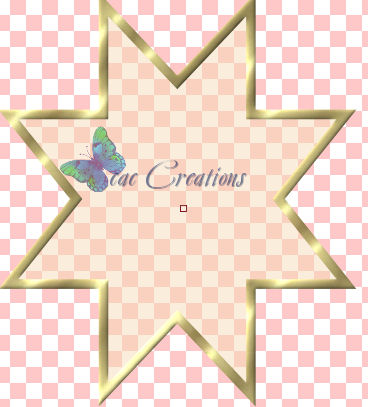
5. Choose the star in the preset shapes  use my settings. use my settings.

6. Draw a medium size star. See mine below.

7. Right click on the word "Vector" and convert it to a raster. Then right click on raster 2 and rename it star.
8. With the Star activated go to effects/3D effects/inner bevel and use my settings. If you do not see a difference in the star then your on the wrong layer. Click the undo arrow and check your layers to make sure that Star is activated. The word star will be highlighted.

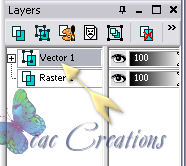
9. Now go to layers/new raster layer and when the box comes up name it shadow. Leave the rest of the setting alone and click okay.
10. Go back to layers/arrange/move down. Your shadow layer should now be below your star layer. My layers look like this now:
11.
With your shadow layer activated see above click on your magic wand  and click in the center of the star. Your marching ants will be inside of the star. and click in the center of the star. Your marching ants will be inside of the star.

12. Now go to selections/modify/expand and it expand the marching ants by "4" pixels. Click okay.
13. Maximize your castle (or tube your using) and click on the materials pallet. Choose a from your tube. I used: #f5dbb7. Go back to your project after you choose your color.
14. With your shadow layer still activated flood fill  the layer with your color choice. My project now looks like this: the layer with your color choice. My project now looks like this:

15. Select none.
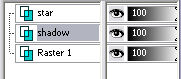
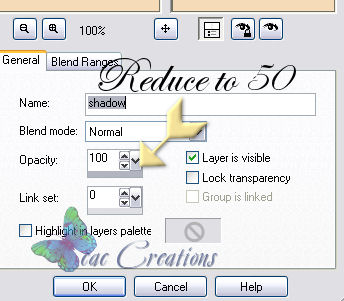
16. On your shadow layer double click on the actual word "Shadow" so that the properties box comes up like so:

17. Reduce the "Opacity" to 50 then click OK.
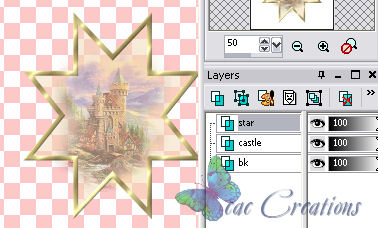
18. Go to layers/merge/merge visible. You now have a star with a transparent center like so: And on that image you should be down to a merged layer. Minimize it to your PSP you will use it later.
19. Now go to file/new and use the same settings as before and make a new image. Then open up the castle tube ( or the tube your using) and go to Edit/Copy. Now go to your new blank canvas and go to edit/paste/paste as a new layer. Close your original tube you will not need it now.
20. Remember that I love to rename everything so go to your raster2 layer (activate it) and right click and rename it castle. I also went to my raster 1 layer activated it, right clicked and renamed it background. It just takes a few simple steps to make you work smarter not harder.
21. Open up your star you made and go to edit/copy. Go back to the canvas that your castle is on and make sure your castle layer is activated then go to edit/copy/paste/paste as a new layer. It will say raster 1, right click on it and rename it star. My canvas now looks like this:
22. I wanted my star to be more over my castle so I used my raster deform tool  and moved it up over a little. You may not have to do this and it may center perfectly. and moved it up over a little. You may not have to do this and it may center perfectly.
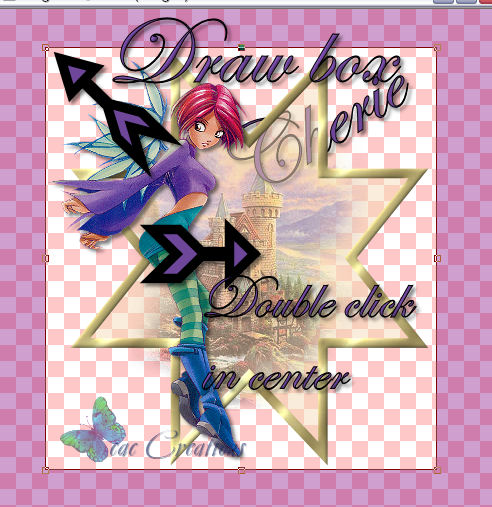
23. Now open up your dream Girl tube go to edit/copy. Then go back to your working canvas with your castle and star and go to edit/paste/paste as a new layer. Make sure when you do this that your star layer is activated.
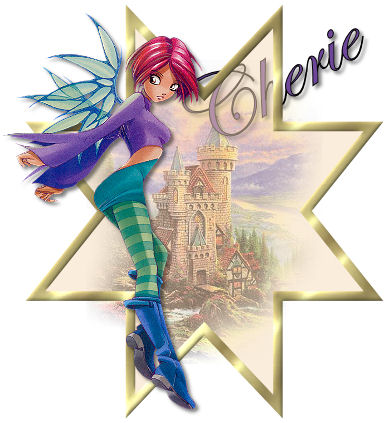
24. Take your raster deform tool and position the girl were you feel it looks best on your working canvas. See mine.

Note don't forget to right click on the new layer you just added and rename it girl.
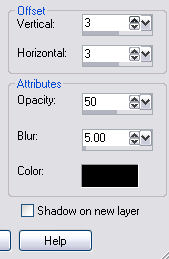
25. Lets add a drop shadow to give our girl a 3d effect. Go to effects/3d effects/drop shadow. ( make sure your on the girl layer) and use my settings.
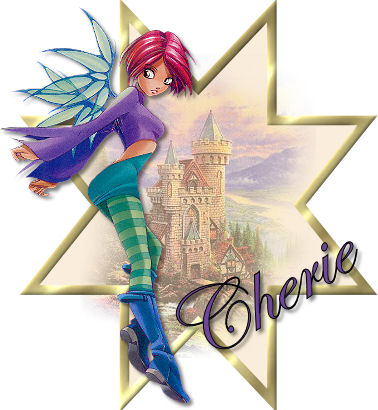
26. Okay now lets add a name. Pick out a pretty font and add a name somewhere on your tag see my finished one above to see were I placed my name. You may want it elsewhere remember this is your creation so make it the way you like it.
27. Add a drop shadow to your name with the same settings as above.
28. When your all finish go to layers/merge/merge visible.
29. Use your crop tool  and crop it down to the a smaller size. Remember to use your crop tool you draw a box then double click in the center of the box. and crop it down to the a smaller size. Remember to use your crop tool you draw a box then double click in the center of the box.
30. Lets save it. Go to file/export/jpeg optimizer and save your finished work.
On a side note. Notice in this example that my name is under the star. To achieve this I only moved my name layer ( already with the drop shadow on it) below the star layer to give it that effect.
Okay that's it I hope you enjoy the lesson. Your assignment is to turn in a tag using the supplies in the lesson, and then make another one using a different preset shape and tubes. Good luck all and I can't wait to see what you make.
SEND YOUR LESSON TO YOUR INSTRUCTOR AND THE GROUP.
Please do not copy, tear apart, email or share these lessons without my permission: Thank You for your understanding and respect for the hard work that goes into these lessons.

Graphics & Content © Cherie.
All Rights Reserved
|