|
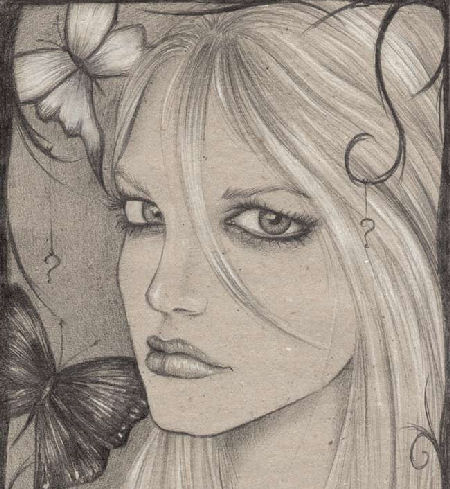
Written and Copyright ©Cherie. This is my own creation, any similarities to other tutorials is purely coincidental and unintentional. Drag the Arrow to mark your progress Right Click the picture and save it to your computer
Part 1 Making Flesh look like Flesh
Prep on Original:
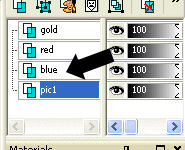
1. After you have saved the above picture to your computer go to PSP and open it up as a new image. 2. It will show up as Background, right click on background and promote background layer. It will then say raster . 3. Rename it pic 1. 4. Right click on the pic 1 layer and click on duplicate. Do that 3 x's so you have the
original and 3 copies. 5. On the layer that is above the original rename it blue. 6. On the layer that is above the Blue rename it Red. 7. On the layer that is above the Red rename it Gold.
Layers Property Box: 8. Double click on the blue layer.
9. A layer's properties box will open. We are going to make a few changes on this to start us out. 10. In the Layers Property box under "Blend Mode" Change were you see it say "Normal" to "Color". Click OKAY when you changed that setting.
11. Do this for Red, and Gold layers as well. Leave the pic 1 as normal..
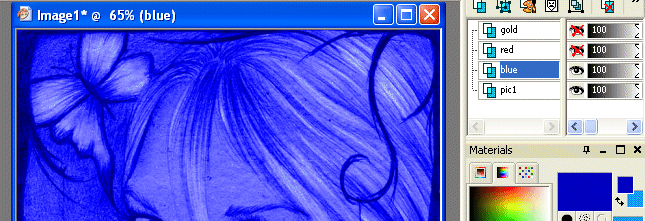
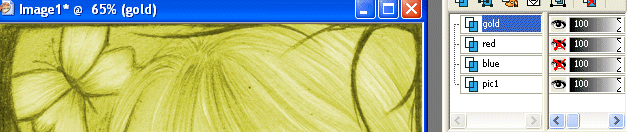
Flood Filling the Layers: 12. Close off everything but the blue layer and pic 1. Make sure the Blue is activated ( the word Blue will be blue when activated). Now flood fill it with a deep blue. I used: #0000c0 See example below:
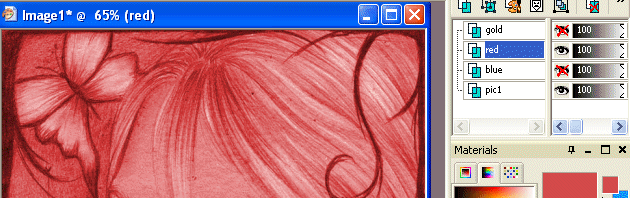
14. Close off the Red layer and open up the gold layer. Make sure it's activated and flood fill it with a yellow goldish color. You don't want a bright yellow for this. I used: e0df8c
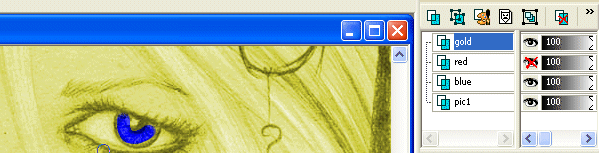
Okay now let's make some blue eyes and pink lips 15. Close off the gold , make sure the Red is activated and blue is unchecked. Take your eraser and start in the center of the eyes, start erasing the red. I set my eraser tip on the circle and size 13. You will see the blue come out on
her. See example below:
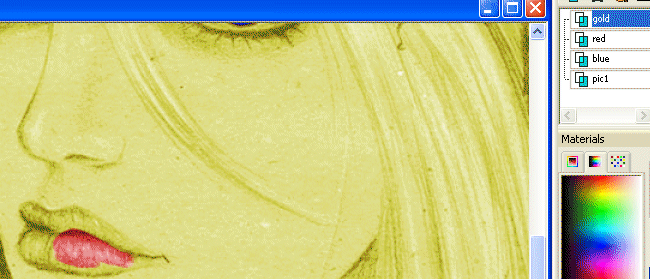
17. While your gold is still active uncheck the red layer and using the eraser, erase on the lips and the red will shine through. Make your eraser size smaller for those
tight spots.
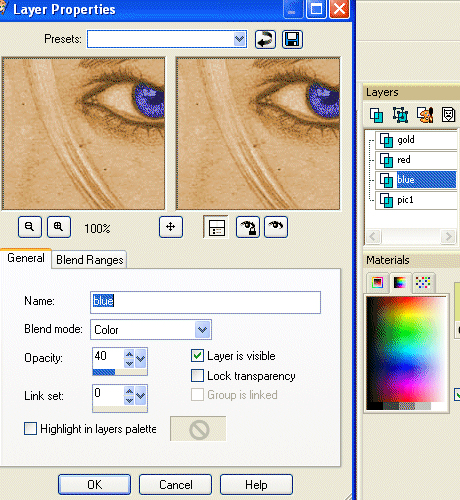
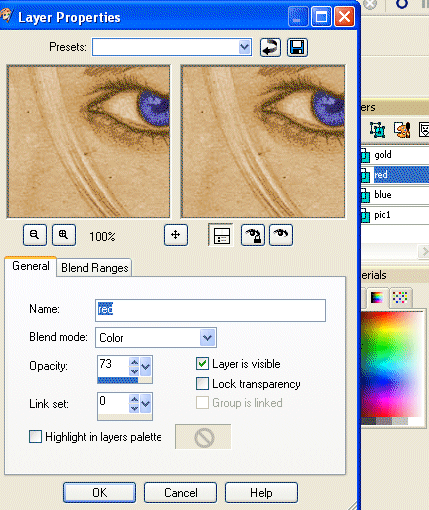
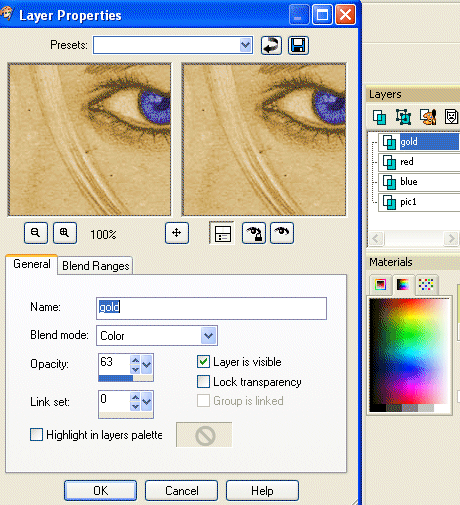
Now comes the easy part. Were going to open up the "Layers Property Box" again. 18. Double click once again on your blue layer and reduce the opacity to 40. See example below: 19. Double click once again on your Red layer and reduce the opacity to 73. See example below: 20. Double click once again on your Gold layer and reduce the opacity to 63. See example below: 21. You should now have a flesh look.
Final touches 22. With your Gold and Blue closed and your Red layer activated use your eraser again and erase all the red except what actually would be the skin area. This would include were the white of the eyes are. Don't be shocked if its coming out grey. It's suppose to.
After I removed all the red I wanted to remove mine looks like this:
See example below: 23. Final touches for flesh tones is to open up the blue and gold layers and merge everything visible this is your final product and your ready to add some colors around the rest of it.
See example below:
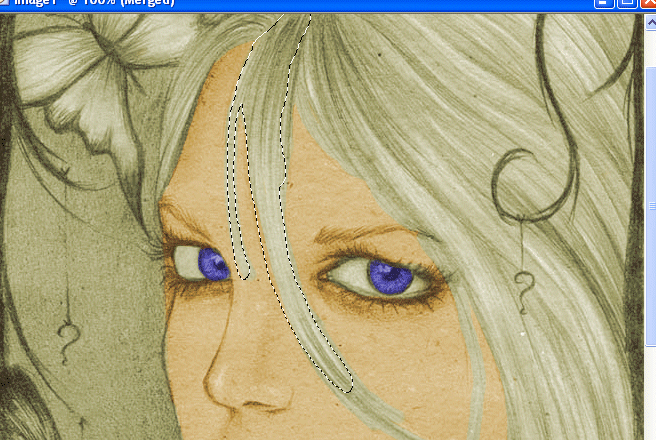
Final touches 24. Take your freehand selection tool and let's start with her hair. Take a portion of it and start outlining the part you want to color. Like so: 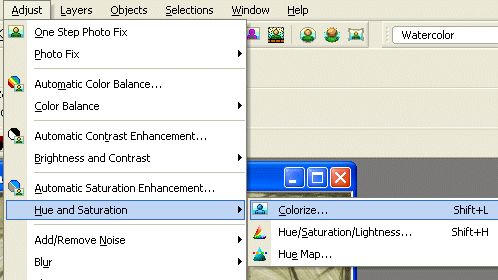
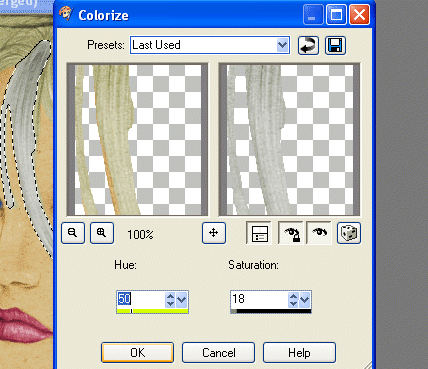
26. And pick the hair colors that you want. Repeat this process until your hair is done.
See example below: 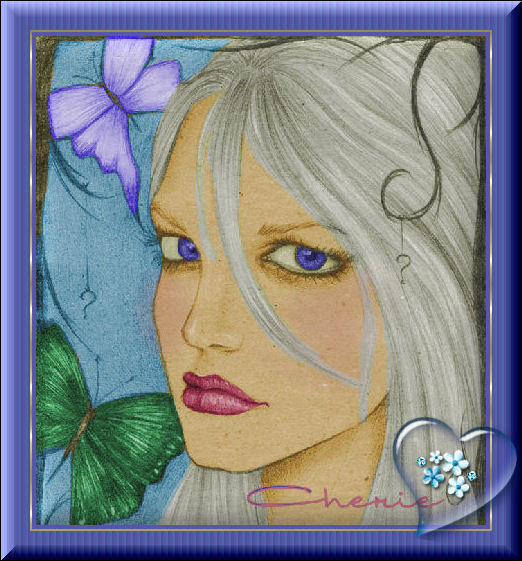
Send in your lesson like so: Cherie's Colorization Challenge For Credit (name). Send them to:  
Please do not copy, tear apart, email or share these lessons without my permission: Thank You for your understanding and respect for the hard work that goes into these lessons.
Graphics/Content © 2007 Cherie. All Rights Reserved.
|