|
Written and Copyright © Cherie
This is my own creation, any similarities to other
tutorials is purely coincidental and unintentional.
DOWNLOAD THE SUPPLIES HERE

I thought we would have a little fun with the selection tool, noise and tubes. Were also going to work on a new style of font effect, inner bevels and framing. I think we will have some fun so let's get started. Your free to use your own supplies but the lesson will require that you turn in a tag based on the tutorial and then another one that you create on your own.
1. Open up a new image 600 x 600 transparent.
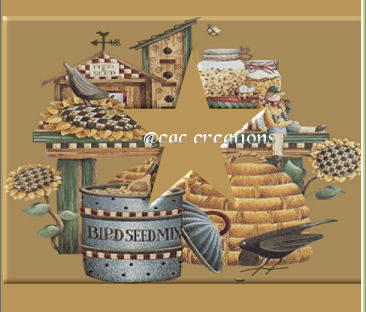
2. Open up the background tube that I enclosed in the supplies or find one of your own that has a complete background to it.
3. Pick a light color from your background for the foreground and a dark color for your background.
4. Copy your background and go to your new image and paste it as a new layer.
5. Now click on your "raster deform tool"  and move your background so that it just about fills up your new image. See below for stretch and then after I stretched it out. Go to adjust/sharpen and sharpen what you just stretched out. and move your background so that it just about fills up your new image. See below for stretch and then after I stretched it out. Go to adjust/sharpen and sharpen what you just stretched out.

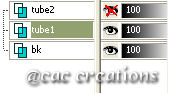
6. You will have 2 layers now Right click on raster 1 and rename it bg and right click on raster 2 and rename it tube1. Mine look like this:

7. Right click on tube1 and duplicate it, right click on it again and rename it tube2.
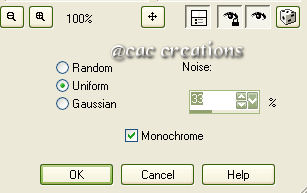
8. Close off tube 2 and activate bg layer and add noise to it. These are my settings:
9. Activate your tube1 layer like so:
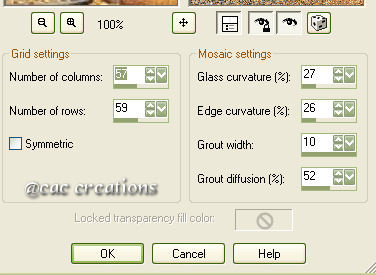
10. Now with tube1 still activated go to effects/texture effects/mosaic glass and use my settings below:
11. Open up tube2 and activate it.
12. Click on your  selection tool and use the selection type I have below. selection tool and use the selection type I have below.

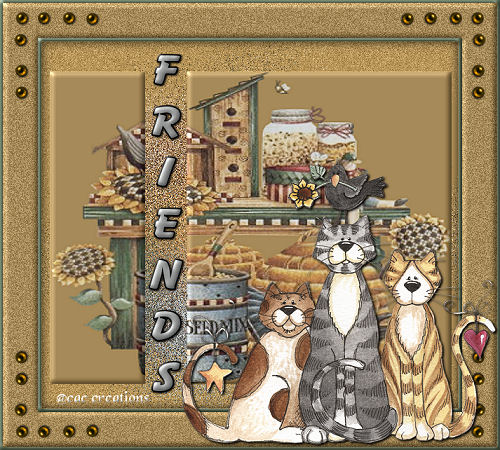
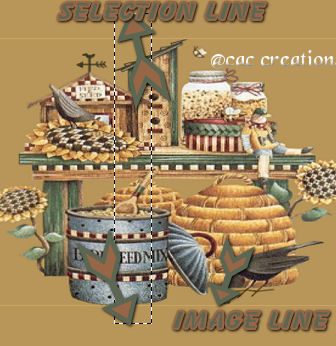
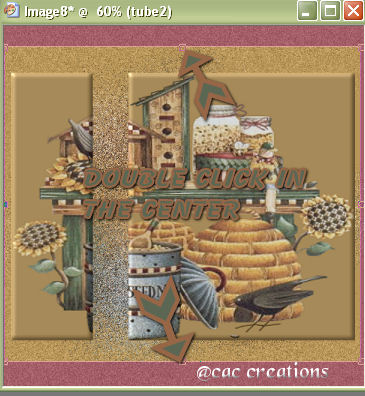
13. Now make sure you tube1 layer is activated and draw a rectangle. Start from the top of your image and go down to the bottom of it. I drew mine so that it was above and below the actual image. Don't make the rectangle to big because your only going to be typing a word in it eventually so you don't want to eliminate to much of the
original graphic. This is how I did mine:
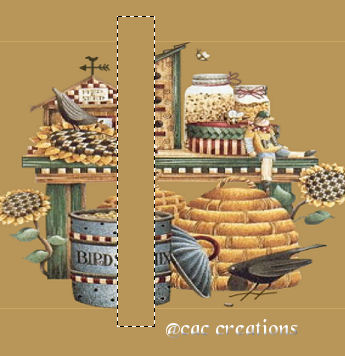
14. With your rectangle made go to your key board and hit the delete key you should have this now:
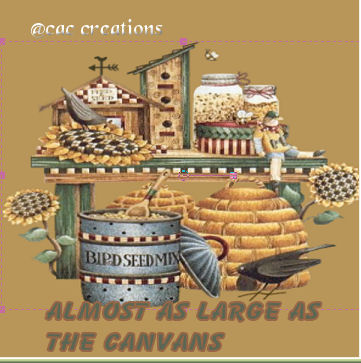
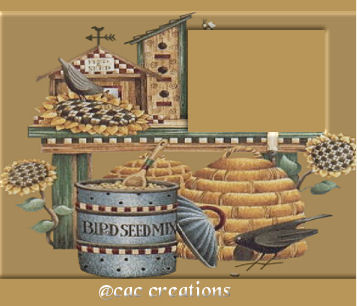
15. Okay I'm going to stop here for a second and give you some additional examples of what you can do with the selection tool. You see above on the right layer you cut out a portion of the graphic your working on. You can make those cuts anywhere on the image and in any shape that is offered within your selections tools. This tag I made I used just the rectangle and
went all the way down but I could have went in the middle of the image and cut out only the center part or used a circle or a star the sky is the limit and once you add the inner bevel as were getting ready to do you will see the dynamic differences. I have placed a couple of examples below and I applied the inner bevel to those examples. Move to step 11 to inner bevel you image.
16. Okay lets continue on. With your rectangle portion of your image cut go to selections/select none.
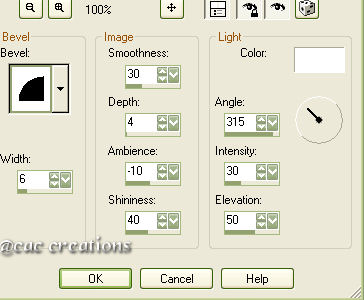
17. Go to effects 3d effect/inner bevel and apply the same inner bevel that I used: You will have the same pop out effect on your cut out image like I have from the examples above.
18. Now grab your  tool and box off your tag so that it does not have so much of the background see mine below. tool and box off your tag so that it does not have so much of the background see mine below.
19. Pick your text tool and pick a nice font and color for your tag. Make your text settings like mine below but remember to change them back when your done. These are my settings:

20. Type in your text and then right click on the vector and convert it to a raster. Reposition your text so it is in the center of your cute out. See mine below.

21. With your text layer activated apply the same inner bevel as you did above.
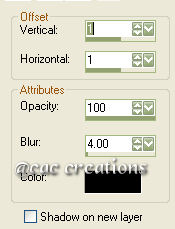
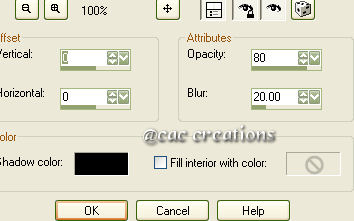
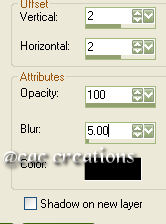
22. Now go to effects/3d effect/drop shadow and apply these settings:
23. Go to image/add border and choose a color from your tube for your first border. Keep track of the color that you used because you will have to repeat it. Set your settings to 4
24. Take your magic wand  and click on the new border you just made. and click on the new border you just made.
25. Repeat the same inner bevel as you did from step 17.
26. Selection/invert.
27. Effects/3d effects/cut out and use these settings:
28. Select none.
29. Go to image/add border and apply these settings make sure you use the white.

30. Take your magic wand and click in the white border you just made. You should have a double set of marching ants. If you don't then check your settings.
31. Flood Fill  it with the original color you used for your background. it with the original color you used for your background.
32. Apply noise with the same settings you used above. The setting should still be the same when you go to use your add noise.
33. Repeat the same inner bevel as you did from step 17.
34. Selections none.
35. Repeat step 23 through 25.
36. Select none.
37. Open up the corners tube supplied in the lesson go to edit/copy click on your main image and go to paste/paste as a new layer.
38. click on your raster deform tool and move your corner up to the far center side of your image like so:
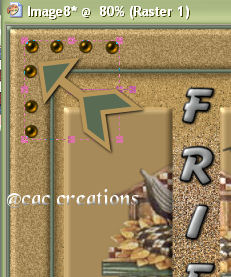
39. With the corner activated go to effects/3d effects/drop shadow and repeat the same drop shadow as above.
40. Right click on the corner and duplicate it 3x's. Rename the original 1 then the duplicated layers as follows 2, 3 4.
41. Activate 2 and go to image/mirror.
42. Activate 3 and go to image/flip.
43. Active 4 and go to image/flip then go back and do image/mirror. All of your corners should be around your main image. See picture above for reference.
44. Right click on 4 and merge/visible.
45. Open up the cat tube I supplied and go to edit/copy then click on your main tag and go to edit/paste as a new layer. Click on your raster deform tool and position your tube in the lower right hand corner of your tag so its below and on the frame portion of the tag. You may have to resize your tube and you can do that by the raster deform tool . But if you do that don't forget to sharpen it.
46. With the tube activated go to effect/3d effects/drop shadow and add this shadow:
47. Add your watermark to it, I had to resize mine because it was 700 pixels by the time I was finished so I resized it down to 450. Make sure all layers is marked when you resize it and sharpen it. Merge it all flatten and send it in for credit.
These are some other examples of using the selections tool that I talked about in step 15:

I hope you enjoyed this lesson and learned a little bit more about those tools.
SEND YOUR LESSON TO YOUR INSTRUCTOR AND THE GROUP
Please do not copy, tear apart, email or share these lessons without my permission: Thank You for your understanding and respect for the hard work that goes into these lessons.

Graphics/Content © 2007 Cherie. All Rights Reserved. Page edited by Jenn Schueller
|