|
Written and Copyright ©CAC Creations
This is my own creation, any similarities to other
tutorials is purely coincidental and unintentional.
Go to your PSP folders and in "All Lessons", "Cherie's Challenges " make a new folder name: Let's Play!!
DOWNLOAD SUPPLIES HERE:
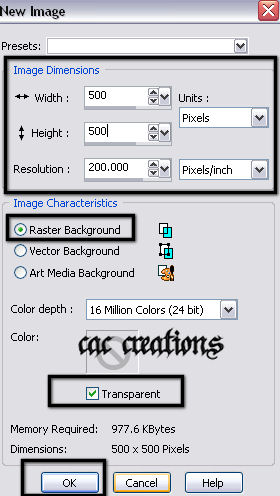
1. Start a new image 500 x 500 transparent like example below.
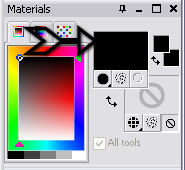
2.Click the foreground on your materials pallet.
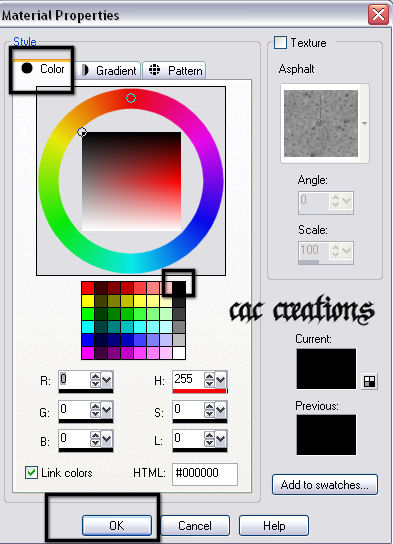
3. A box will open up like my example below. Click on the color tab and click black.
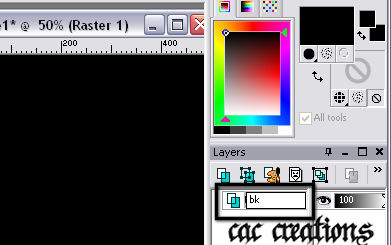
4. On your main tool bar click on the paint bucked  and flood fill your working canvas with black. and flood fill your working canvas with black.

5. Notice up above were it says raster 1, right click on the actual raster 1 words and click rename., Rename it bk.
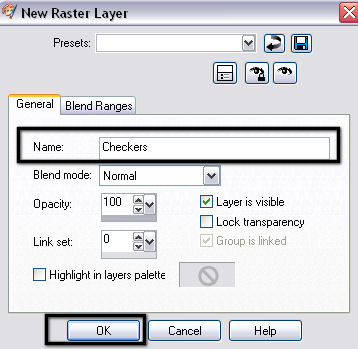
6. Go to layers/New raster layer. A box will open up.

7. When the box opens up name it checkered. See below.
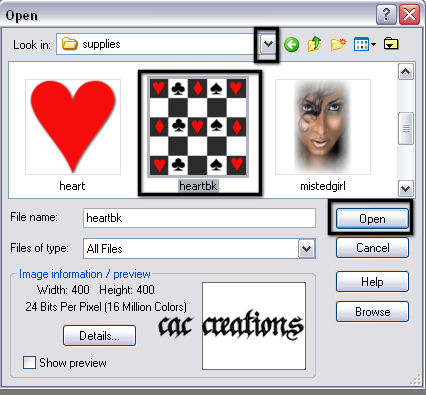
8. Go to file/open look for were you placed your lesson supplies and find the heartbk click okay.
8. On your working project go to selections/select all.
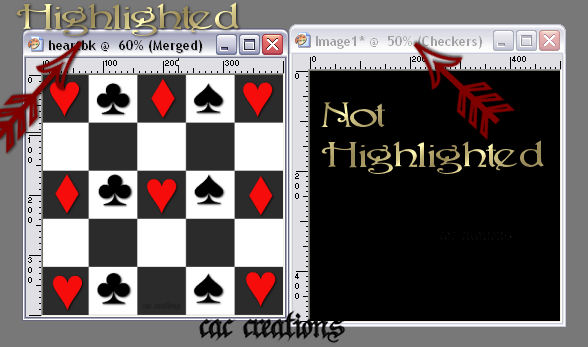
Take a minute with me to take a look at how we know when we have the right images up in our PSP. Notice the actual title bar of each one. Heartbk is darker then image 1 that indicates it is the active file that will show in our layers pallet. To activate the other one instead just click on its title bar and it will be a darker color.
9. Okay now that we have had that brief detour, go to the heartbk and activate it and go to edit/copy.
10. Go over to your tools and click on your hand tool  , ,
11. Go back to your working canvas that you have the marching ants around and right click on it and paste into the selection like so:
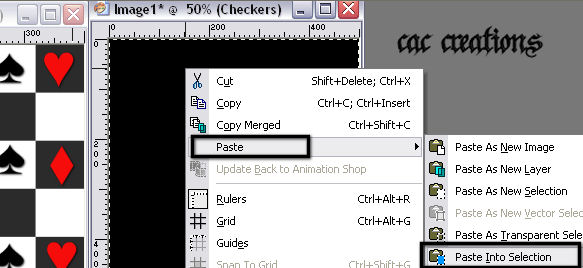
Your checker background will now be over top of the black.. Don't panic
that's correct.
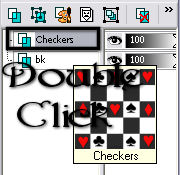
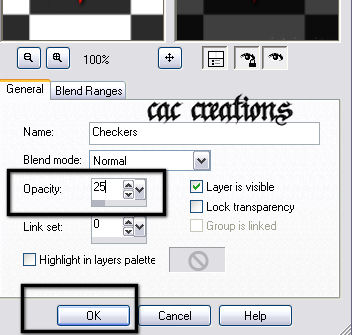
12. Over on your layers pallet on the right double click on the word checker. A box will open up.
Properties box - REDUCE THE OPACITY TO 25 CLICK OKAY
13. Go to selections/select none.
14. Close your heartbk tube you will not need it any further.
15. Like you did above go to file/open and open up the cards tube from your supplies.
16. On the cards tube go to edit/copy.
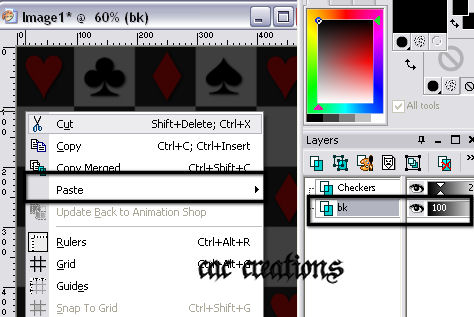
17. Go back to your working project and activate the bk layer, to do that click on the word bk in the layers pallet and it will highlight. On the actual canvas right click and paste as a new layer like so:
Note if your having problems pasting it don't forget to click on your hand tool again.
18. The new layer will come up and say raster 1, right click on it and rename it cards

19. Double click on the card layer (refer to step 12) and lower the opacity to 50.
20. Close the card tube you don't need it anymore.
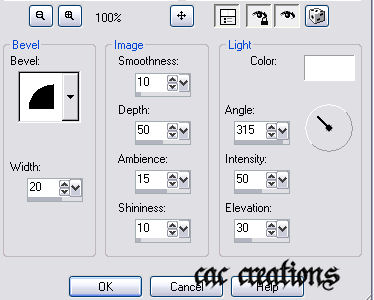
21. Go to file/open and open up the mistedgirl tube.
22. Go to edit/copy.
23. Go back to your working image but this time click on the checkers layer to activate it.
24. On the working canvas right click like step 17 and paste as a new layer.
25. This will show up as raster 2 in the layers so right click on it and rename it girl.
26. Click on your move tool  and move the mistedgirl tube toward the center hand side of your canvas like so. and move the mistedgirl tube toward the center hand side of your canvas like so.

27. When your happy with her placement click on your A tool and add some text to your project. I also added a drop shadow to give my text a 3d look. I did that by going to effects/3d effect/drop shadow. Play with the effects and see what works best for you.
28. When your happy with your text, go to layers/merge/merge visible.
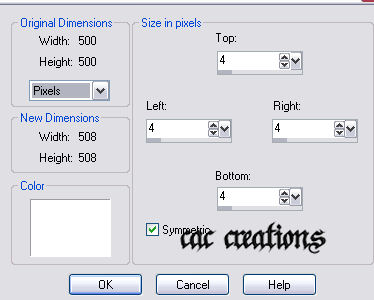
29. Now lets add a border. Go to image/add border and make your settings like mine below. To change the color box just click on it like you do when you change the colors in the materials pallet.
30. Use your magic wand  and click inside the white border. and click inside the white border.
Note if your having trouble with this part check your presets to make sure they look like mine below if you don't see your presets then click on F4 on your keyboard.

After I clicked inside my border it looks like this:
31. Flood fill the border with a color or pattern of your choice I used a gold pattern.
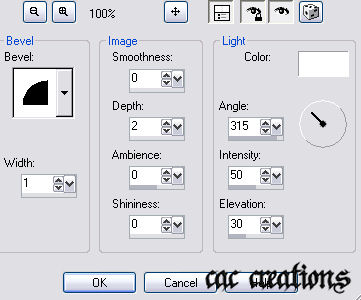
32.With your marching ants still around your border to effects/3d effects and apply a bevel using the same settings as I have below.
33. Selections/select none
34. Go back to image/add border but this time make it 30 and black in color.
35. Click on your magic wand and click on your new black border.
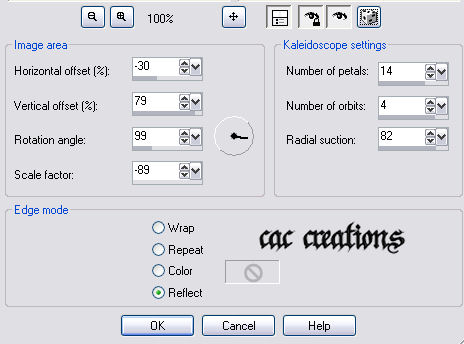
36. With your marching ants still on your border go to effects/reflection effects/kaleidoscope and apply these settings.
37. With your marching ants still on your border go to effects/3d effects/inner bevel and apply this bevel.
38. Go to selections/select none.
39. Repeat steps 29 through 32.
40. Go to image/resize 450 x 450 pixels.
41. Go to adjust/sharpen.
ASSIGNMENT:
1. Send in one by following the lesson above.
2. Send in another one that you use with different tubes that you may have, also play around with the
kaleidoscope settings to see the cool things that it can do.
I added some borders in the supplies so if you want to have some fun with them you can. 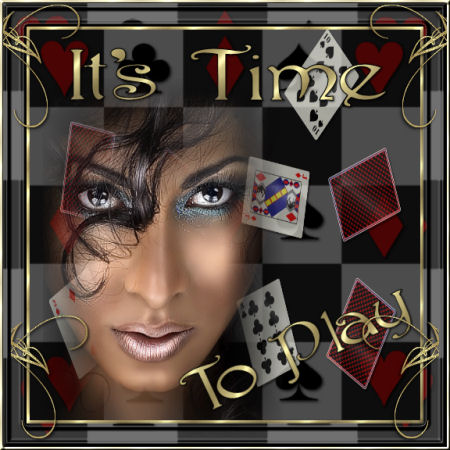
SEND YOUR LESSON TO YOUR INSTRUCTOR AND THE GROUP
Please do not copy, tear apart, email or share these lessons without my permission: Thank You for your understanding and respect for the hard work that goes into these lessons.

Graphics/Content © 2006 Queen Krissy New-Bee's. All Rights Reserved. Page edited by Jenn Schueller
|
