|
1. Open a new image 500 x
500 transparent.
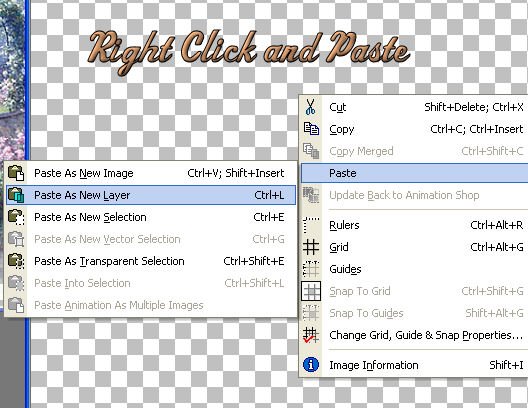
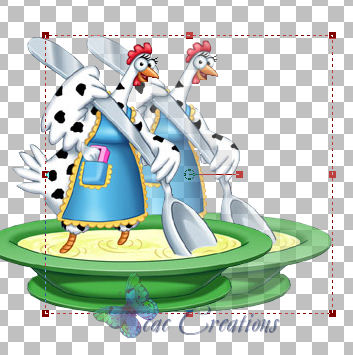
2. Pick a tube you want to use
copy it and paste it as a new layer. On your new
500 x 500 image right click and paste as a new image. Your new image should now be in the center of your 500 x 500 image.
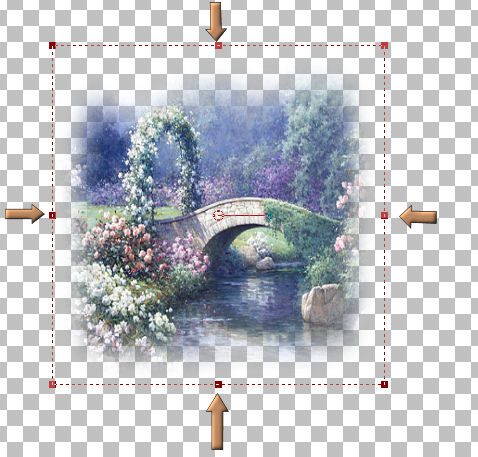
3. If it doesn't fit you may need to resize
it. To do this on the left hand side of your psp click
on the raster deform tool.

4. Nodules will come up around your
image and you can resize your graphic by either moving the
nodules up or down or side to side like so:
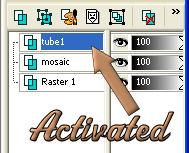
5. Your layers Pallet looks like
this: To rename your layers you click on raster 2
right click and click on rename. Now rename your raster 2
as Mosaic.

6. Duplicate Mosaic
layer and rename it tube1. To do this right click again
on now the new layer called Mosaic and click on
duplicate. You will now have 3 layers showing up in your
layers on the right of your psp. Raster
1, Mosaic
Layer and Tube 1.
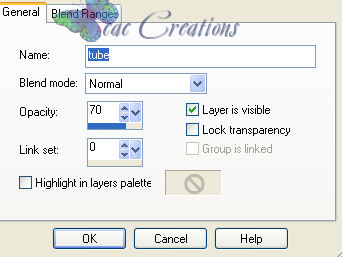
7. You see above were it says
Raster 2 and you know to rename that to Mosaic. If
you double click after you rename it on the mosaic a
properties box will
open up On your Mosaic layer double
click on that layer and reduce the opacity down to 70
percent. See
Example
8. While
on your Mosaic layer take your
raster deform tool (reference above) and move it over just
a bit so you can see it underneath the tube1
layer.
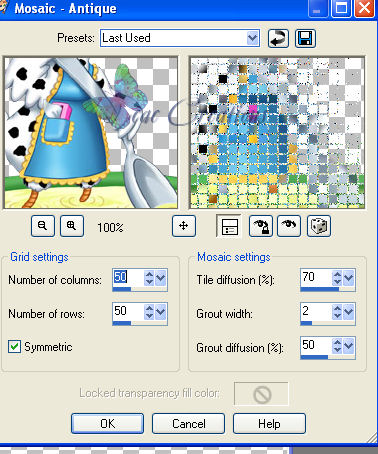
9.
While still on your mosaic layer go to effects/texture
effects/Mosaic Antique. And use my settings are play
around with your own to get different
effects
10. Using your raster deform tool reposition your new mosaic background
until you get the desired effect for your tag.
11. Now to give your tag a more
striking appearance. Click on your tube1 layer ( when I
refere to click on a layer it simply means
to go to the layer on the right and
side and click on it, it will go blue to show
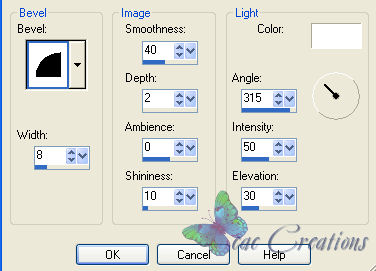
you its activated see example) and add a drop shadow and even
a innerbevel. To use
both those effects go to effects/3d then use
drop shadow first then inner bevel. DO NOT USE THE
EFFECTS ON THE MOSAIC YOU MADE. This is the settings
that I used for both. Example of Layers
Inner Bevel
Drop Shadow

12..
Now add your name or wording that you would like on the
tag. I used the same drop shadow on my name and inner
bevel.
13. Crop it down to size and merge it all
visible.
14. Go to export/save as
gif.
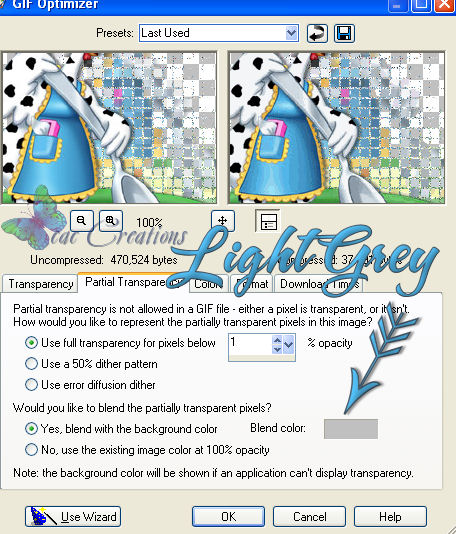
15. Remember when you save as a gif with a
drop shadow the transparency has to be grey or the shadow will
not save correctly. Check out my
settings.

|