|
Written and Copyright ©CAC Creations
This is my own creation, any similarities to other
tutorials is purely coincidental and unintentional.
Go to your PSP folders and in "All Lessons", "WHATEVER BEES " make a new folder name: NAME OF LESSON
DOWNLOAD SUPPLIES HERE: 
1. Start a new image 500 x 500 transparent.
2. Go to layers/new raster layers/ click okay.
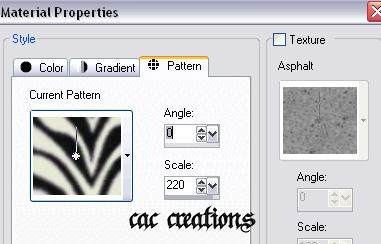
3. Open up your pattern from the supplies and go to your foreground on the materials pallet and click on it.
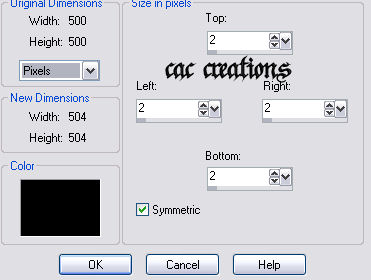
4. When the properties box opens up look for your pattern from the supplies. Make your settings like mine.
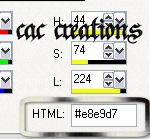
5. Now click on the background and place this number in the HTML portion. #e8e9d7.
6. Make sure raster 1 is activated it will be highlighted. Then take your mouse and place it over your working canvas and right click this will flood fill your area with the background color.
7. Activate raster 2 by clicking on the words raster 2, take your mouse place it over your working image and center click. This will flood fill that raster layer and should now see your pattern and under it will be the solid color.
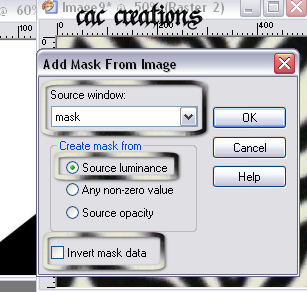
8. Open up the mask from the supplies, make sure your still on raster 2 and go to layers/new mask layer/from image and make your settings the same as mine.
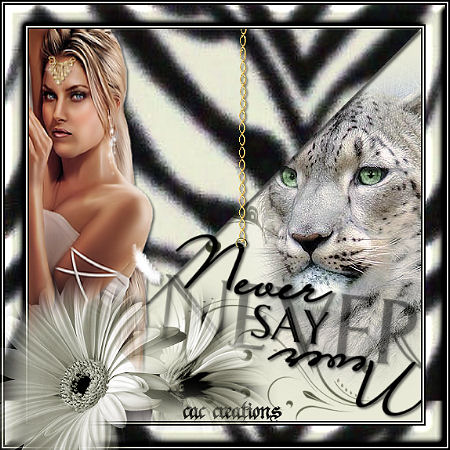
9. This is what you have so far
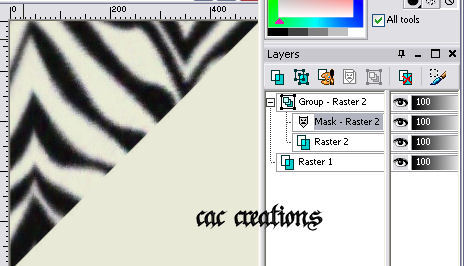
10. NOw notice from the image above you have a group-raster 2, and your mask-raster 2 is highlighted, right click on it and hit delete, a box will open just click yes.
11. Raster 2 will now be highlighted. Click on Group-raster 2 to activate it and right click and merge/group.
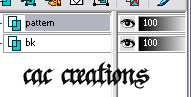
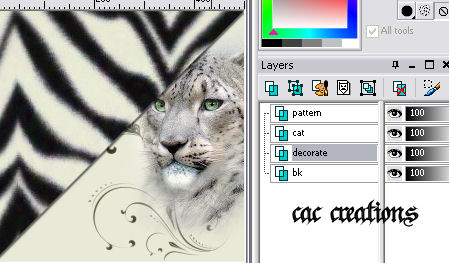
12. Click on Raster 1 to activate it then right click and rename bk, then click on group-raster 2 to activate it right click and rename pattern. This is how it looks now .
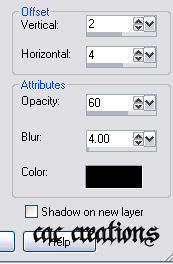
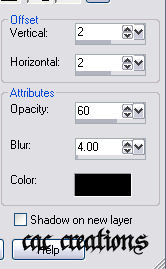
13. While your on your pattern layer go to effects/3d effects/drop shadow and add this shadow.
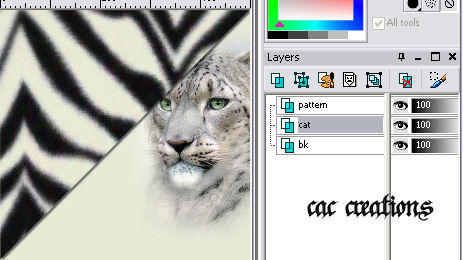
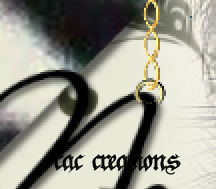
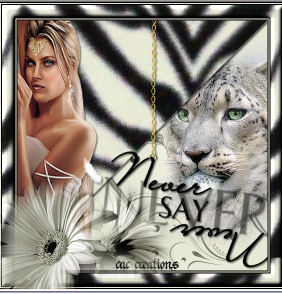
14. Open up your cat tube and right click on it and copy. Go to your working canvas and actiave the bk layer. Right click and paste as a new layer.
15. Right click on raster 1 and rename cat. Then click on your move  tool and move your tiger down and to the right of your working canvas like so: tool and move your tiger down and to the right of your working canvas like so:
16. Open up your decoration tube right click and copy, now activate your bk layer and on your working canvas right click and paste as a new layer. This time use your raster deform tool and move the decoration to the far right hand corner of your project. Right click on Raster 1 and rename it decorate
17. Open up your word tube and right click and copy, now activate your pattern layer and on the working canvas right click and paste as a new layer. Use your raster deform tool and place your words close to your tigers mouth. Right click on raster 1 and rename it never.
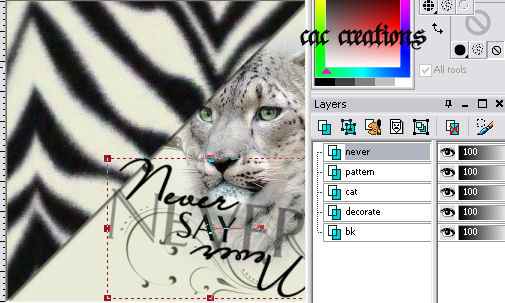
18. With your never layer activated go to effects/3d effects/drop shadow and apply this shadow
19. Open up your chain tube right click and copy, go back to your working canvas and never layer should still be activated. On your canvas right click and paste as a new layer. Right click on raster 1 and rename chain. Take your raster deform tool and move your chain toward the top of the image and the loop part of the chain is on the curve of the letter N in your words.
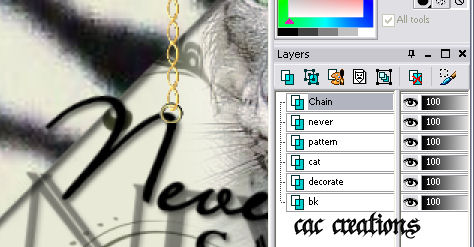
20. Now with your eraser size set at 1 erase a small part of the loop so that you give the appearance that the letter is hanging from the chain.
21. Go to effects/3d effects/drop shadow and apply the same drop shadow as you did in step 18.
22. Open up your girl tube and right click on it and copy. Go to your working canvas and the chain layer should still be activated. Right click on your canvas and using your move tool and move her all the way over to the center side of your project. Notice I took over so it looks as if she is leaning on the side of the border like so:

23. Go to effects/3d effects/drop shadow and apply the same drop shadow as you did in step 18.
24. On the girl layer right click and merge visible.
25. Add your watermark if you have one.
26. Go to image/add border - with these settings. Make your color black
27. Go to image/add border same settings as above only this time make the color #e8e9d7.
28. Go to image/add border same settings as above but make it black.
29. Go to image/add border this time make it 25 all around and use the #e8e9d7 color.
30. Take your magic wand (make sure your tolerance and feather is set at 0) and click in side the border. Flood fill it with your pattern.
31. With the border still selected go to effects/3d effects/inner bevel and apply this bevel.
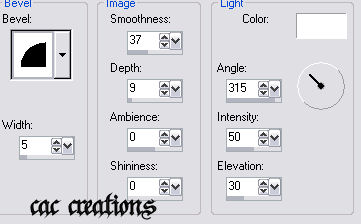
32. Go to selections/select none.
33. Go to image/add border 2 all the way around make it black.
34. Go to image/add border 2 all the way around make the color #e8e9d7.
35. Go to image/add border 2 all the way around make it black.
36. Open up the flower tube right click and copy move the flower so its down on the lower center hand side of your canvas like so.
37. Right click on raster 1 and merge/visible.
38. Go to image resize and resize it at 450 x 450 pixels, go to adjust and sharpen.
39. Go to file/export/jpeg optimizer, give it a name and save it.
Assignment:
1. Follow the lesson and turn it in based on the lesson.
2. Use the mask provided and follow the lesson with the mask, find some other tubes and make another one for credit.
SEND YOUR LESSON TO YOUR INSTRUCTOR AND THE GROUP
Please do not copy, tear apart, email or share these lessons without my permission: Thank You for your understanding and respect for the hard work that goes into these lessons.

Graphics/Content © 2006 Queen Krissy New-Bee's. All Rights Reserved. Page edited by Jenn Schueller
|