Drag the Arrow to mark your progress
1. Open up your image that your going to
use. Remember to pick something that will
look like it is standing out of the frame..
2. Right click on your new image under
layers and "Promote the image.

3. Now rename it Pic1
4. Duplicate Pic1 by right clicking on it
under layers, rename that new layer Pic2. You
should now see this:
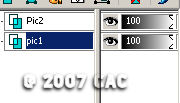
5. Close off Pic2 by clicking on the eye
and activate Pic1 by clicking on it. It
should be highlighted blue like so:
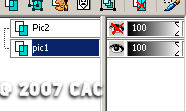 .
.
6. Now with your selection tool selected
at a rectangle with the following settings were
going to box off a portion of our graphic.
The reason we are using the rectangle is so that
we can frame out image a little later.

7. You want to box out the image so that
whatever graphic you are using will eventually
appear like it is stepping out of the frame.
See how I made my selection:
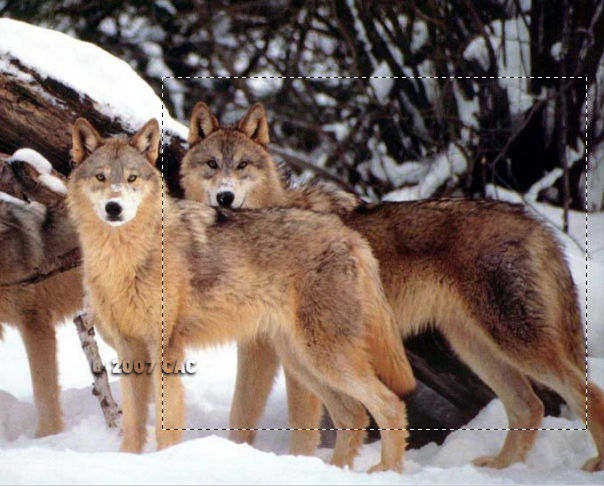
Notice
that the outline above has my 1st wolf's had and a
portion of its body on the outside of the box that
I made. This will be the part that will
appear to be stepping out of the frame.
8. Once your satisfied with rectangle
selection go up to selections and click on invert.
9. Now go to your key board and
click the delete key. You should now have
something that looks like this:
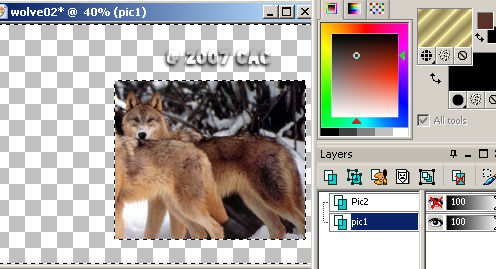
10. Select none.
11. Now were going to get a little
interesting here. So follow along step by
step. With your pic1 still activated go to
edit/copy and pick a blank spot on your PSP and
right click and Paste as a new image..
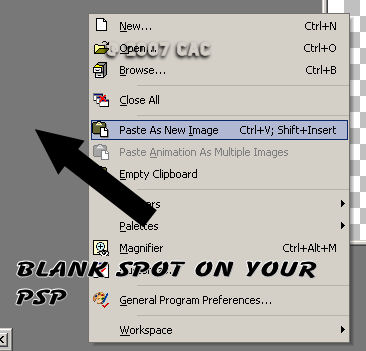
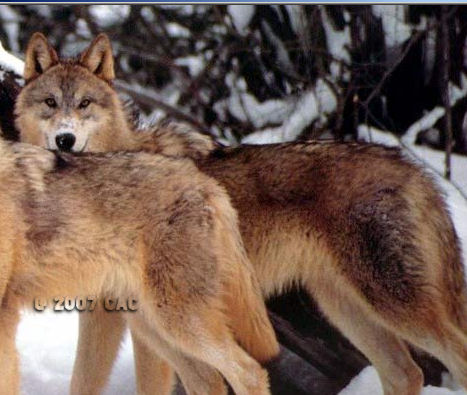
This will be the one that we will frame
12. My piece for framing looks like this:
13. Now make a pretty frame to complement
your graphics this is what mine looks like when I
was all done. Don't forget your watermark this is
a perfect time to add it.
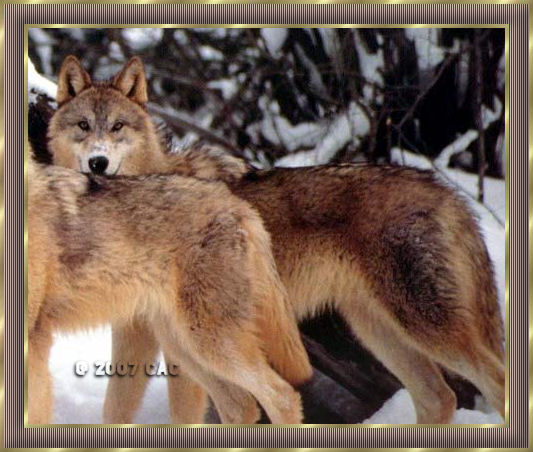
Poor headless Wolf. But no fear were going
to add the rest now.
14. When your completed with your frame go up
to edit/copy.
15. Just in case you screw up don't close
your "New" framed copy. Minimize it.
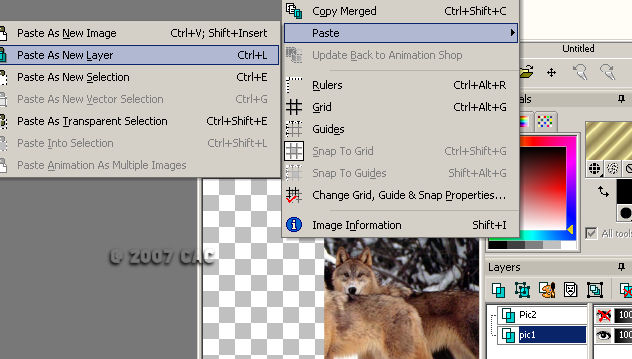
16. Now go back to your original project
and right click on it and paste the new frame as a
"new Layer". Rename it as framed.
 .
.
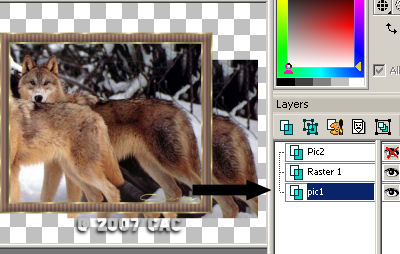
17. Now you should have 3 layers on the
original project. Go to Pic1 and delete it.
We are replacing it with the framed one.
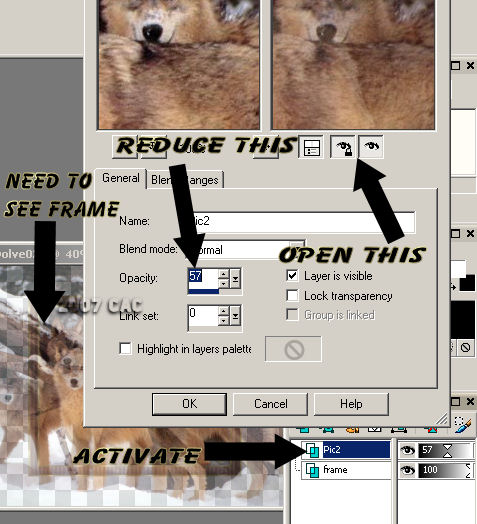
18. Now open up Pic2 and double click on
the word so the properties box opens up. Now
drop down your Opacity so that you can start to
see the frame under the original picture.
Note take a look at the screen shot at "open this"
if you click and open those up you will be
actually able to see the changes before you click
"ok" that way you don't have to back up as much.
Once your happy that you can see the borders of
the frame (that's the goal) click Ok.
19. This is were it gets a little tricky.
You need to line up your "New" framed image with
the old pic2 image. So activate the frame
layer and with the raster deform tool and your
frame layer active move it so that the pictures
even up like so .
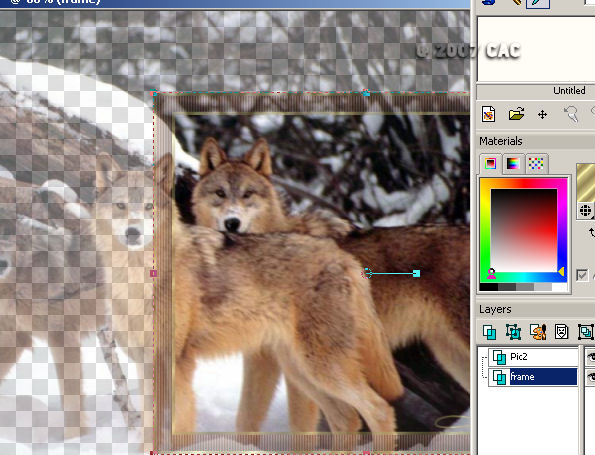
Honestly I think this portion is the hardest
part of the entire tut. Once you have this
done you will see how it comes altogether. On a
side note its okay if it looks a tad blurry
because were going to fix that. The most
important thing to remember is that the outer
portion of your picture matches like above my head
and legs of my wolf on the left matches up were it
would have left off from the frame.
20. Once you have your 2 pictures lined up now
active pic2 layer and click on your lasso
selection tool. Settings should look like
this:

21. On pic1 one start outlining the portion of
the picture that you want to appear like it is
stepping out of the frame like so:
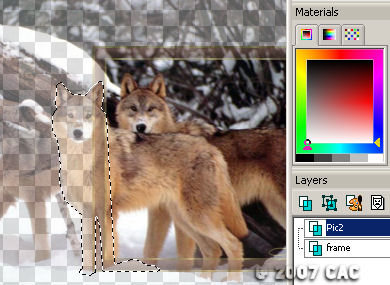
22. Once your happy with the outline go
to selections and click invert. Then on your
key board hit the delete key. I have this
now:
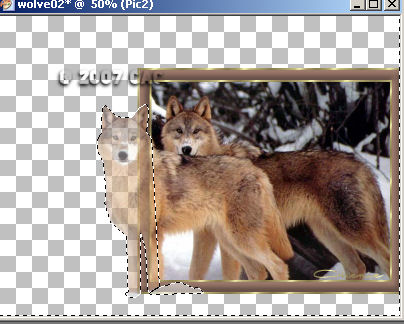
23. Select none..
24. Once again double click on the Pic2
layer and increase the opacity to 100 like so:
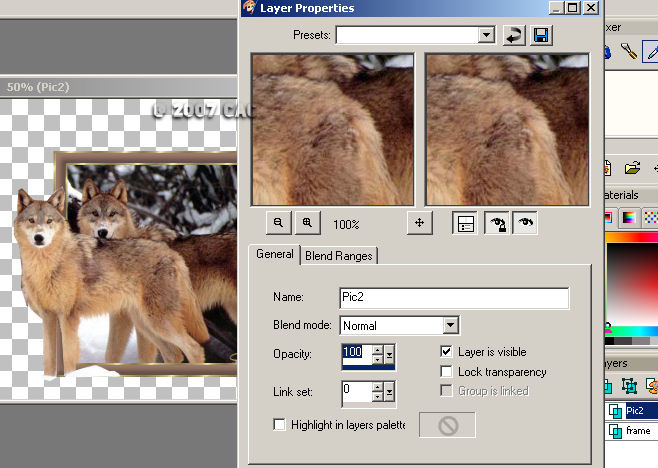
Resize it and save it as a gif and your done.
Assignment:
1. Create one using the lesson supplies
2. Create another one using your own supplies
Send to your Instructor and the group; Please be sure to indicate the lesson name
Please do not copy, tear apart, email or share these lessons without my permission: Thank You for your understanding and respect for the hard work that goes into these lessons.

Graphics/Content © 2007 Cherie.
All Rights Reserved.
Page edited by Jenn Schueller.