|
Written and Copyright ©CAC Creations
This is my own creation, any similarities to other
tutorials is purely coincidental and unintentional.
Go to your PSP folders and in "All Lessons", "Cherie's Challenge " make a new folder name: Unicorn
DOWNLOAD SUPPLIES HERE: 
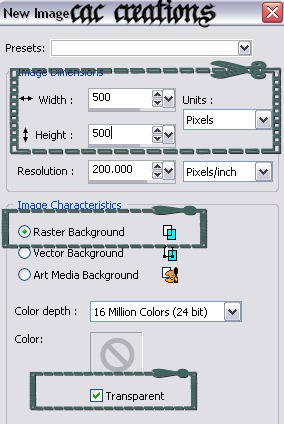
1. Go to file/new image and make your settings like mine below:
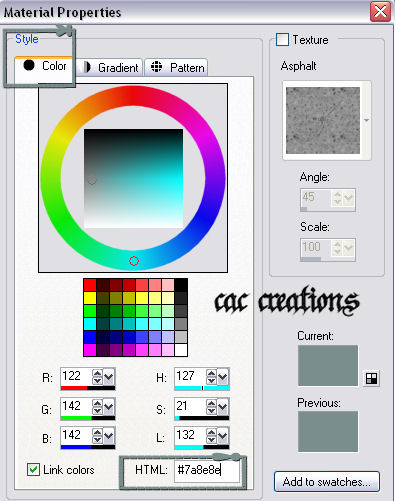
2. Click on your materials pallet and your click on the color tab when the box comes up. In HTML place this number there. #7a8e8e
3. Click on your paint bucket  and flood fill your working canvas with the green. and flood fill your working canvas with the green.
4. Go to file/open look for the unicorn in the supplies and open it up in your PSP.
5. With your unicorn tube open go to edit/copy.
6. Go back to your working canvas and go to selections and select all.
7. Go back edit and paste into the selections.

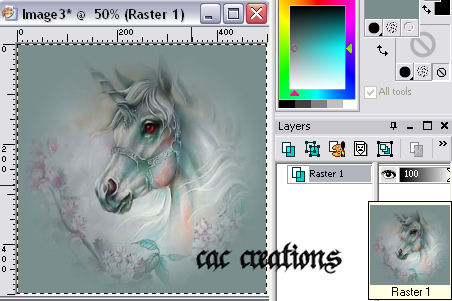
8. Notice that I still only have raster 1 and my unicorn is now apart of the green background.
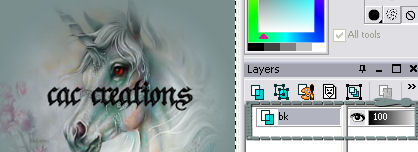
9. See above that the raster 1 layer is highlighted that is referred as activated. Take your mouse and right click on Raster 1, when the choices come up click on rename and rename the Raster 1 layer bk.
10. Go to selections/select none.
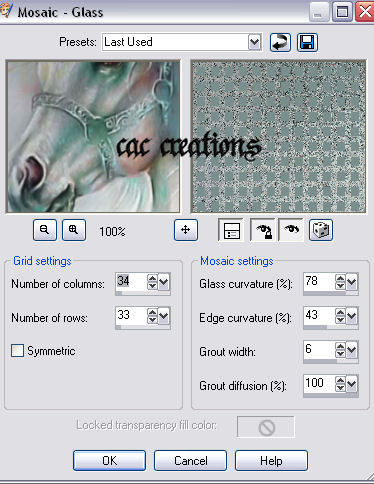
11. Go to effects/Texture effect/Mosaic-Glass and apply the same settings that I have below.
12. Go back to your unicorn tube and go to edit/copy.
13. On your working canvas to edit/paste as a new layer.
14. You will now show two layers, your bk and Raster 1. Like above right click on raster 1 layer and rename it unicorn.

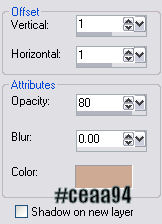
15. With your unicorn layer activated lets add a different color drop shadow to see the effect. I used: #ceaa94 as the color in the drop shadow. See below. NOTE: To change the color just click in the color box and place the above number in the HTML box.
16. Right click on the layer unicorn and merge it all flatten. You will notice that the layers have changed to 1 layer and its named background. Why do you ask that we name our layers above? To get you used to it. Name your layers is the key to a successful project. The larger it is the more layers you will have, and the more you have the easier it is to get lost. Renaming them helps you keep them in check.
17. Now go to selections/select all.
18. Go back to selections/modify/contract by 10.
19. Go back to selections/invert.
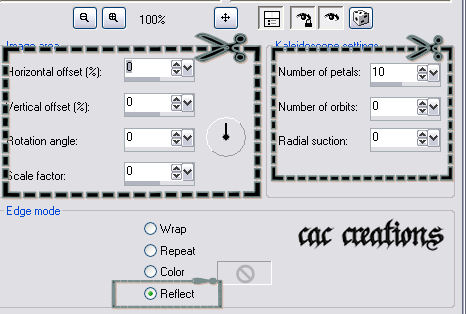
20. Go to effects/reflection effects/kaleidoscope and make your settings the same as mine.
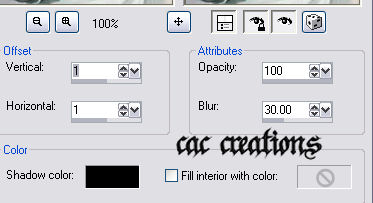
21. Go to effects/3d effects/drop shadow and apply this shadow. Notice I changed the color of the shadow back to black.
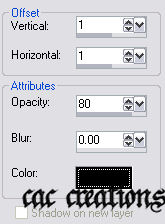
22. Go back to effects/3d effects/drop shadow and apply a reverse drop shadow. A reverse drop shadow is simply changing the vertical and
Horizontal to negative numbers to match the positive numbers so in this case you change them to -1 vertical and -1 Horizontal. Opacity and blur, stay the same.
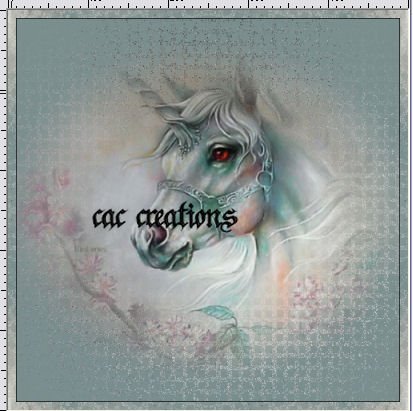
23. Go to selections/select none. See what mine looks like now. It would appear the shadows help define the edges a little more making it look like its standing out more.
24. Go to image add border - 20 all sides, black.
25. Use your magic wand  and click in the black border if you don't get exactly what I have below then check your magic wand settings your tolerance and feather should be 0 on the presets. If you don't show presets then click F4 to activate it. and click in the black border if you don't get exactly what I have below then check your magic wand settings your tolerance and feather should be 0 on the presets. If you don't show presets then click F4 to activate it.
26. Click on your paint bucket and flood fill your border with the same color you used for the background.
27. Go to effects/reflection effects/kaleidoscope and click okay.
28. Go to selections/invert.
29. Go to effects/3d effects/cut out and apply the cut out like below.
30. Go back to effects/3d effects/cut out and apply a reverse cutout. Remember from up above? Change the vertical and Horizontal to -1 all the other settings stay the same.
31. Go to selections/select none.
32. Go to image/add border and make it 5 black all sides.
33. Use your magic wand and click in the black border.
34. Click on your paint bucket and flood fill your new border with the same color you did above.
35. Go to effects/reflection effects/kaleidoscope and click okay.
36. Again go to effects/3d effects drop shadow and add the same drop shadow you did in step 21 and do a reverse drop shadow like you did in step 22.
37. Selections/select none.
38. Go to image/add border and make it 30 black all sides.
39. Use your magic wand and click in the black border.
40. Click on your paint bucket and flood fill your new border with the same color you did above.
41. Go to effects/reflection effects/kaleidoscope and click okay.
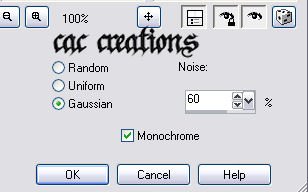
42. Go to adjust/add/remove noise - Add noise and use the same settings I did below.
43. Go to effects/distortion effects/ripple and apply the same settings I did below:

44. Go to effects/3d effects and add the same drop shadows that you did above, Go back and do the reverse drop shadow as well.
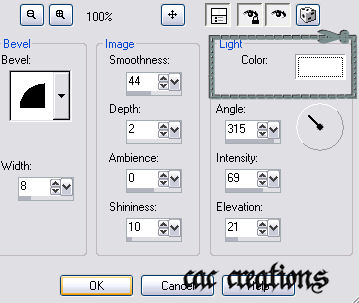
45. Go to effects/3d effects inner bevel and apply this bevel. Notice the color is White. If you have black on your color on the bevel it will turn the entire bevel black so make sure you change that color before you click okay.
46. Go to selections/select none.
47. Go to image/add border 5 all sides black.
48. Click on the border with your magic wand .
49. Click on your paint bucket and flood fill your border with the same color you did above.
50. Go to effects/reflection effects/kaleidoscope and click okay.
51. Go to effects/3d effects/drop shadow and apply the same one you did above, don't forget to do the reverse shadow.
52. Selections/select none
53. Add your watermark and text now.
54. Go to image/resize and resize your image to 450 x 450 pixels (not percent).
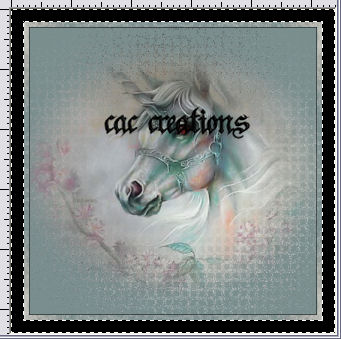
55. Go to file/export jpeg optimizer and save your
finished work.
ASSIGNMENT:
1. Send one in finished like the lesson above.
2. Send in a second one that you use your own tube for, Change the kaleidoscope settings to see the different effects of it. Play with it you won't break it. Once your done send it in for credit.
Send your lesson to your instructor and the group.
Please do not copy, tear apart, email or share these lessons without my permission: Thank You for your understanding and respect for the hard work that goes into these lessons.

Graphics/Content © 2006 Queen Krissy New-Bee's. All Rights Reserved.
|
