

Click on the Button to the Right to return to the main Page
and the Button on the left to mail in all your Work:

Please do not copy, tear apart, email or share these lessons
without my permission: Thank You for your understanding and respect for
the hard work that goes into these lessons:

|
WORKING WITH COLORS & TEXTURES:
Written and Copyright © Krissy Baker
|
Move the arrow along each step you are on so you don't lose track:
Just left click on the arrow and drag to where your at:
Good luck and have fun!
First let me explain the color pallets.
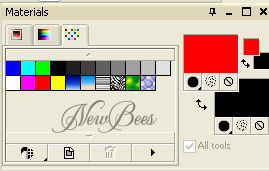
This is your Materials Pallet sometimes referred to as a Color Pallet:
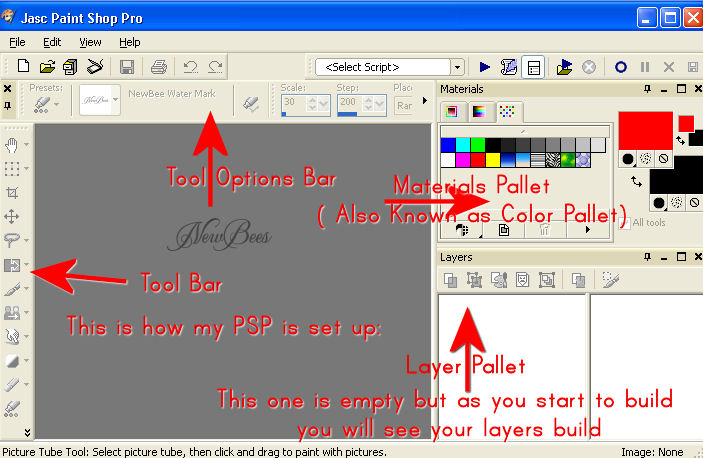
Here you see how my PSP is set up.
Here you can see my foreground color is red: This will be your outside boarder of your text.
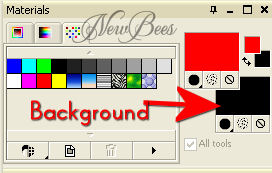
Here you see that my background color is black: This will be the fill in for my text.
When you have a Lesson or Tutorial writer tell you to change your foreground color or
background color these are the ones they are talking about.
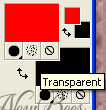
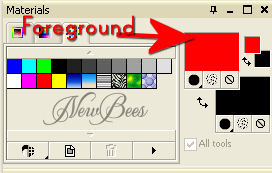
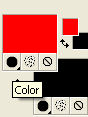
Here your looking at this  button on the foreground and background.
You will hear a writer say to turn off the foreground or background. Here is how your going to do that:

This is unchecked:
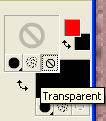
Click on it and you will see that the color has gone and you have a circle with a line through it:
click on it again and you see the color come back. So when you are finished with the
step and needed your Foreground/ Background turned back on your going to click on it
again and get your color back.
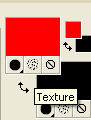
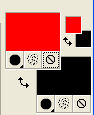
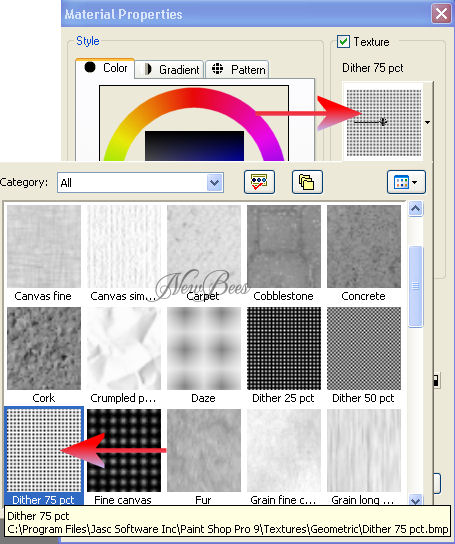
This center Button is texture. When you click on this you will get what ever texture is selected
but I like going into my Options Pallet to use this function: We will get back to this in a min.
Now we are back to our color: If you click on this you will see this:

The top one is your solid colors:
The Middle one is your Gradient Colors:
The last one is your Patterns:
You can click on them here but once again I like using my larger Materials Options Pallet:
Here's how you get to it. Click on your Foreground Where the Red is. You will get a big Window like this:
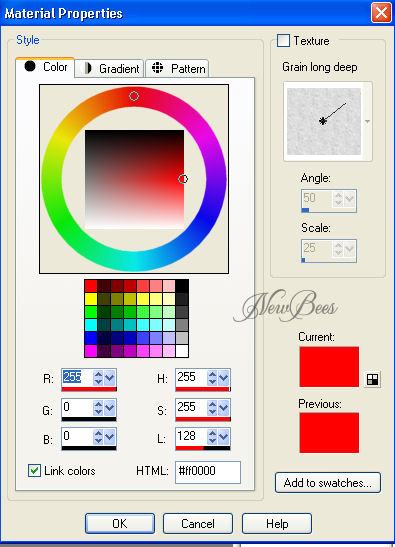
At the top you see three tabs. Those are the same tabs we just talked about.
Your Color/ Gradients/ Patterns. Also you will notice in the far upper right corner
you have Texture and the drop down window to choose the Texture you would like to
work with. In this window your able to set all your settings and get it just the
way you want it all in one place.
When you click on your Background color ( the Black Square ) you are going to get the
some thing so you can set your background settings.
How to use your Foreground and Background to create your own Gradient
A Gradient color is two colors that complement each other in a soft blend into each other.
Select a color in your foreground and background
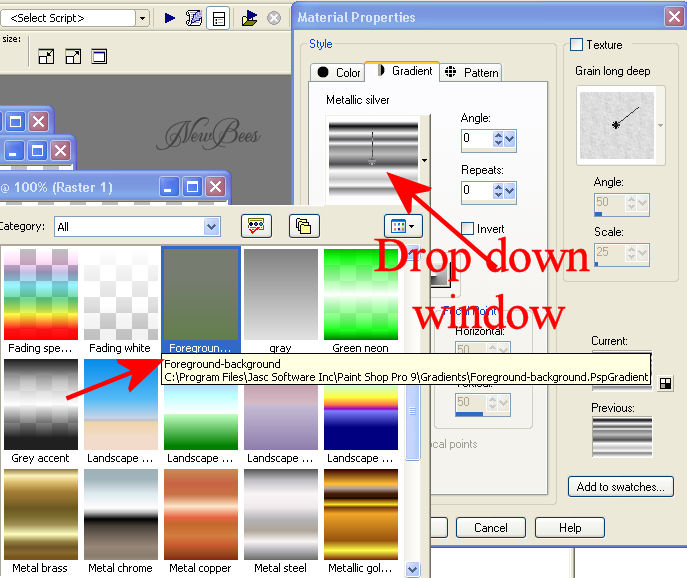
click on your Gradient tab.
In your drop down window find the gradient that says Foreground
( this is your two colors you have picked for your gradient)
Now open a new Image 300 x 300 Transparent background
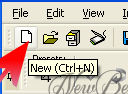
click on this Icon and you will get a Window that looks like this:
You will need to pay attention to all area's with arrows.
These are your settings:
Width: 300
Height: 300
Units: Pixels
Raster Background
Transparent marked
Click Ok
This is what you will have:
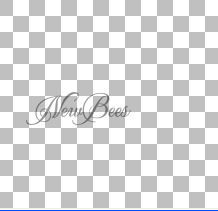
Flood fill  with your new Gradient color. Can you see the two colors mixing into each other?
Now if you change the settings for this you can turn the direction in which it will
go and you can change the repeat. Giving it yet another look.
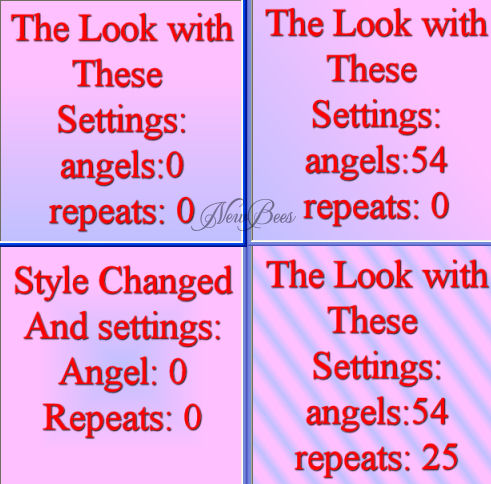
Here's how you change the Style:
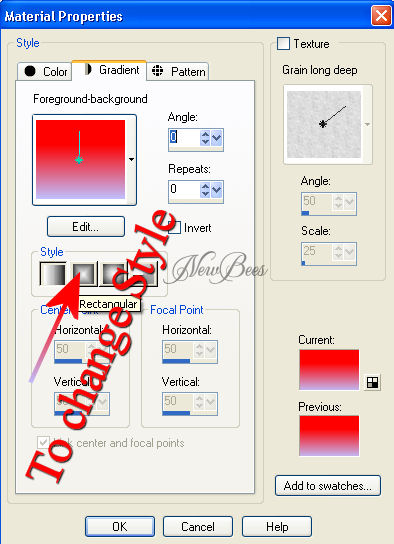
Now for a Short Lesson I would like you to play around with these Settings creating different
colors and looks. Then send in 5 that you have made. Getting to know your color pallets and all
their functions is one of the most important things you can do for yourself before starting to create.
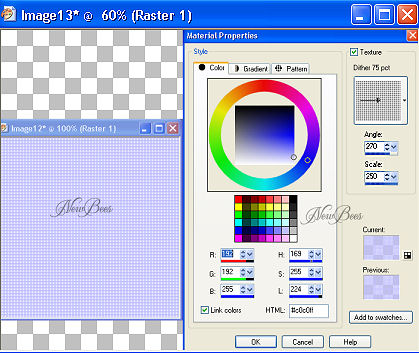
Lets now make some Texture :
We are still working with our Flood fill Tool:
Open a New image 300 X 300 Transparent Background

Click on the Texture
Lets click on the drop down window and find
Here's what you get with:
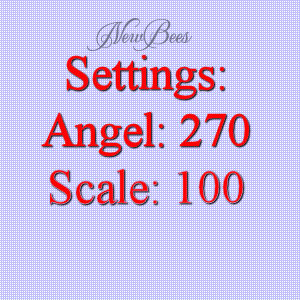
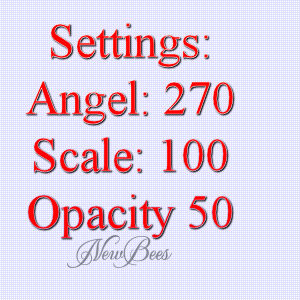
Angel: 270
Scale: 250
This one I have lowered the Opacity on the Flood fill Options Bar: to 50
Your more then likley asking what is a Tool Opetions Bar and what did she lower. Let me show you:

Now play with these settings for a bit. Along with the 5 Gredients you are sending in You will
need to send in 5 Textures you created.
There will be 10 in all.
In the Subject line put what level your in. This lesson's called working with
colors and textures for credit and your name.
Make sure you have attached your 10 color swatches.
Have fun with this lesson.
Hugs and Love,
Queen Krissy