

Please do not copy, tear apart, email or share these lessons without my permission: Thank You for your understanding and respect for the hard work that goes into these lessons.
Graphics/Content © 2006 Queen Krissy New-Bee's. All Rights Reserved.

Graphics/Content © 2006 Queen Krissy New-Bee's. All Rights Reserved.
|
SPARKLED MIRRORED REFLECTION:
Written and Copyright © Teresa T |
Move the arrow along each step you are on so you don't lose track:
Just left click on the arrow and drag to where your at:
Good luck and have fun!
![]()
Find a tube that you would like to see in the mirror.
Open a workspace of 500 x 500
Click on your preset shapes and use the one called ellipse.
Make your Foreground color gold shade and click on the null on the background.
Now make sure your options on your preset are the same as mine.

Now draw an oval to the right side of your workspace.
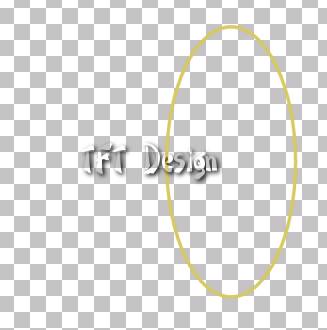
Take your magic wand and click on the oval and get the double marching ants.
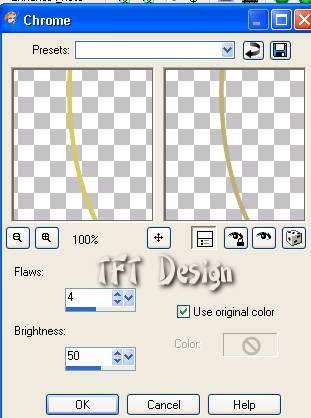
Go to Effects / Artist Effects / Chrome use the following settings
Click on flood fill.
On your foreground click in the Gradient area, Shown here at the arrow
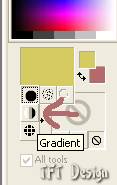
Now inside the Gradient look on the right side for the little box with four squares.
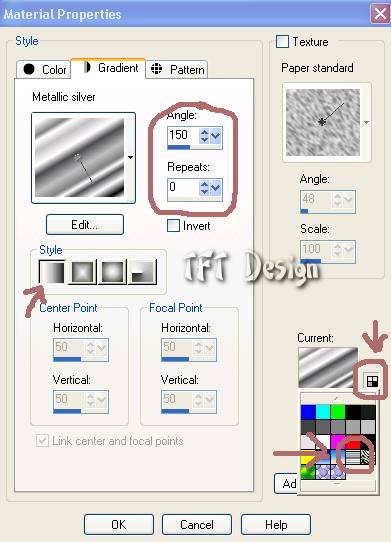
Click in it and choose the Metallic Gradient. Make sure your angel is 150 and Repeats is 0.
Click on the first square in the style section. As seen in the box below. Then click ok.
Now flood fill the inside of your mirror.
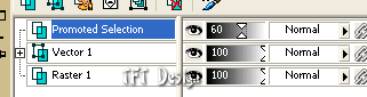
Now on your layers make your opacity 60 so that it looks more like a reflection.
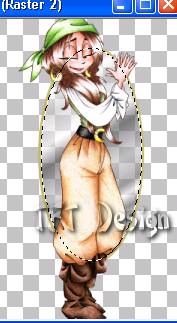
With your marching ants still going around your mirror get your tube that you want to use.
Copy and paste it into your mirror. Resize it so that it will fit. It is ok that you will
lose the bottom of your tube.
Now remember here if you are doing the opposite image that you have now the go to Image /
Mirror and then copy and paste into the mirror.
Now to resize this image go to Image / Resize and play with the numbers in there and make sure
you unclick resize all layers. You only want to resize the tube you just put on there.
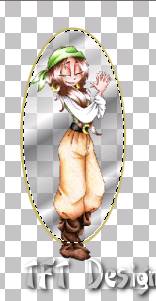
Now click on Selection / Invert ... then hit the delete key on your keyboard. That will take the excess
on the outside of your mirror away.
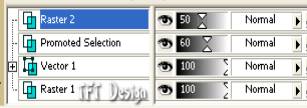
Now on your layer palette move your tube opacity to 50 so that it makes it look like it is inside the mirror.
Click Selection / Select none
Now invert your image to the opposite direction and copy and paste it
to the side of the mirror.
Use your move tool to put it where you would like it. Again go to
Image / Resize and resize it some but not as much as you did when
you put it in the mirror.
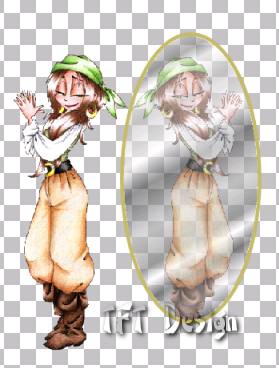
Now put your name on it in a fairly large font. Also if you want any embellishments on it put them now.
Once you have it to your finished state go to Layers / Merge / Merge visible
Crop to size or resize your graphic now. Instead of a boarder I want you to put a picture
frame around it. Watermark included.
Go ahead and open your animation shop up.
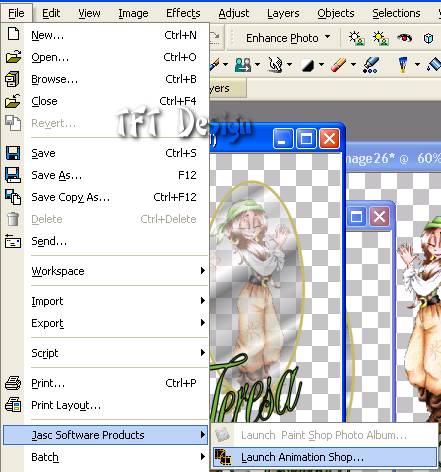
Back in psp highlight your first graphic
Take your magic wand and click in the mirror. Holding down the shift key make sure
the ants are all around your mirror from the inside.

Now Shift D your work so you have three of it on your workspace.
Highlight the first one and go to Adjust / Add/Remove Noise / Add Noise.
Use the following settings.

Now do that with the other 2 making one 30 and one 40.
Then on each one go to Selection / Select none. With the marching ants
gone we are now going to move it over to Animation.
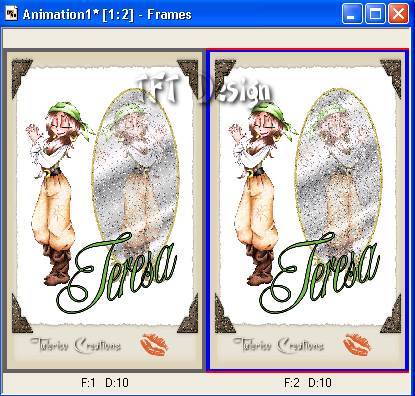
On your first frame right click copy
Click into animation and paste it there.
Zoom the picture down so you can see your total picture.

Now go back and right click and copy your second picture. This time you are going to right
click on the thin red line at the top of the first graphic and get this screen. Click on
paste / after current frame.

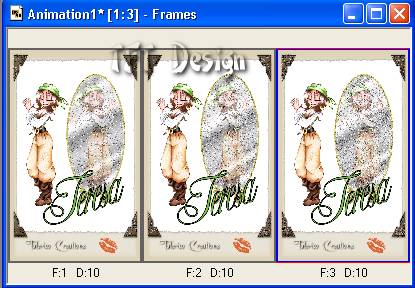
You will now see that the red and blue frame moved to the one you just pasted on there. Like this
Now go and right click and copy your third graphic and do the same as before. Right click on the red
line, paste / after current frame.
This is now what you should have.
Go up to the top right corner of ani shop and click on this button ![]() you will now
you will now
see your animation that you just did.
With all three frames laid out go to Animation / Frame Properties and raise the number up.
The higher the number in that box the slower your frames will go.
Go to Files / Save as
Name your animation
You will get a several screens come up click – next, next, next, finished.
You are done!
Send it in for credit

Hugs and Smiles,
Teresa T
Send in your lesson like so: Extra Lesson 02 For Credit (name). Send them to: